
How to Make a Spider Brooch
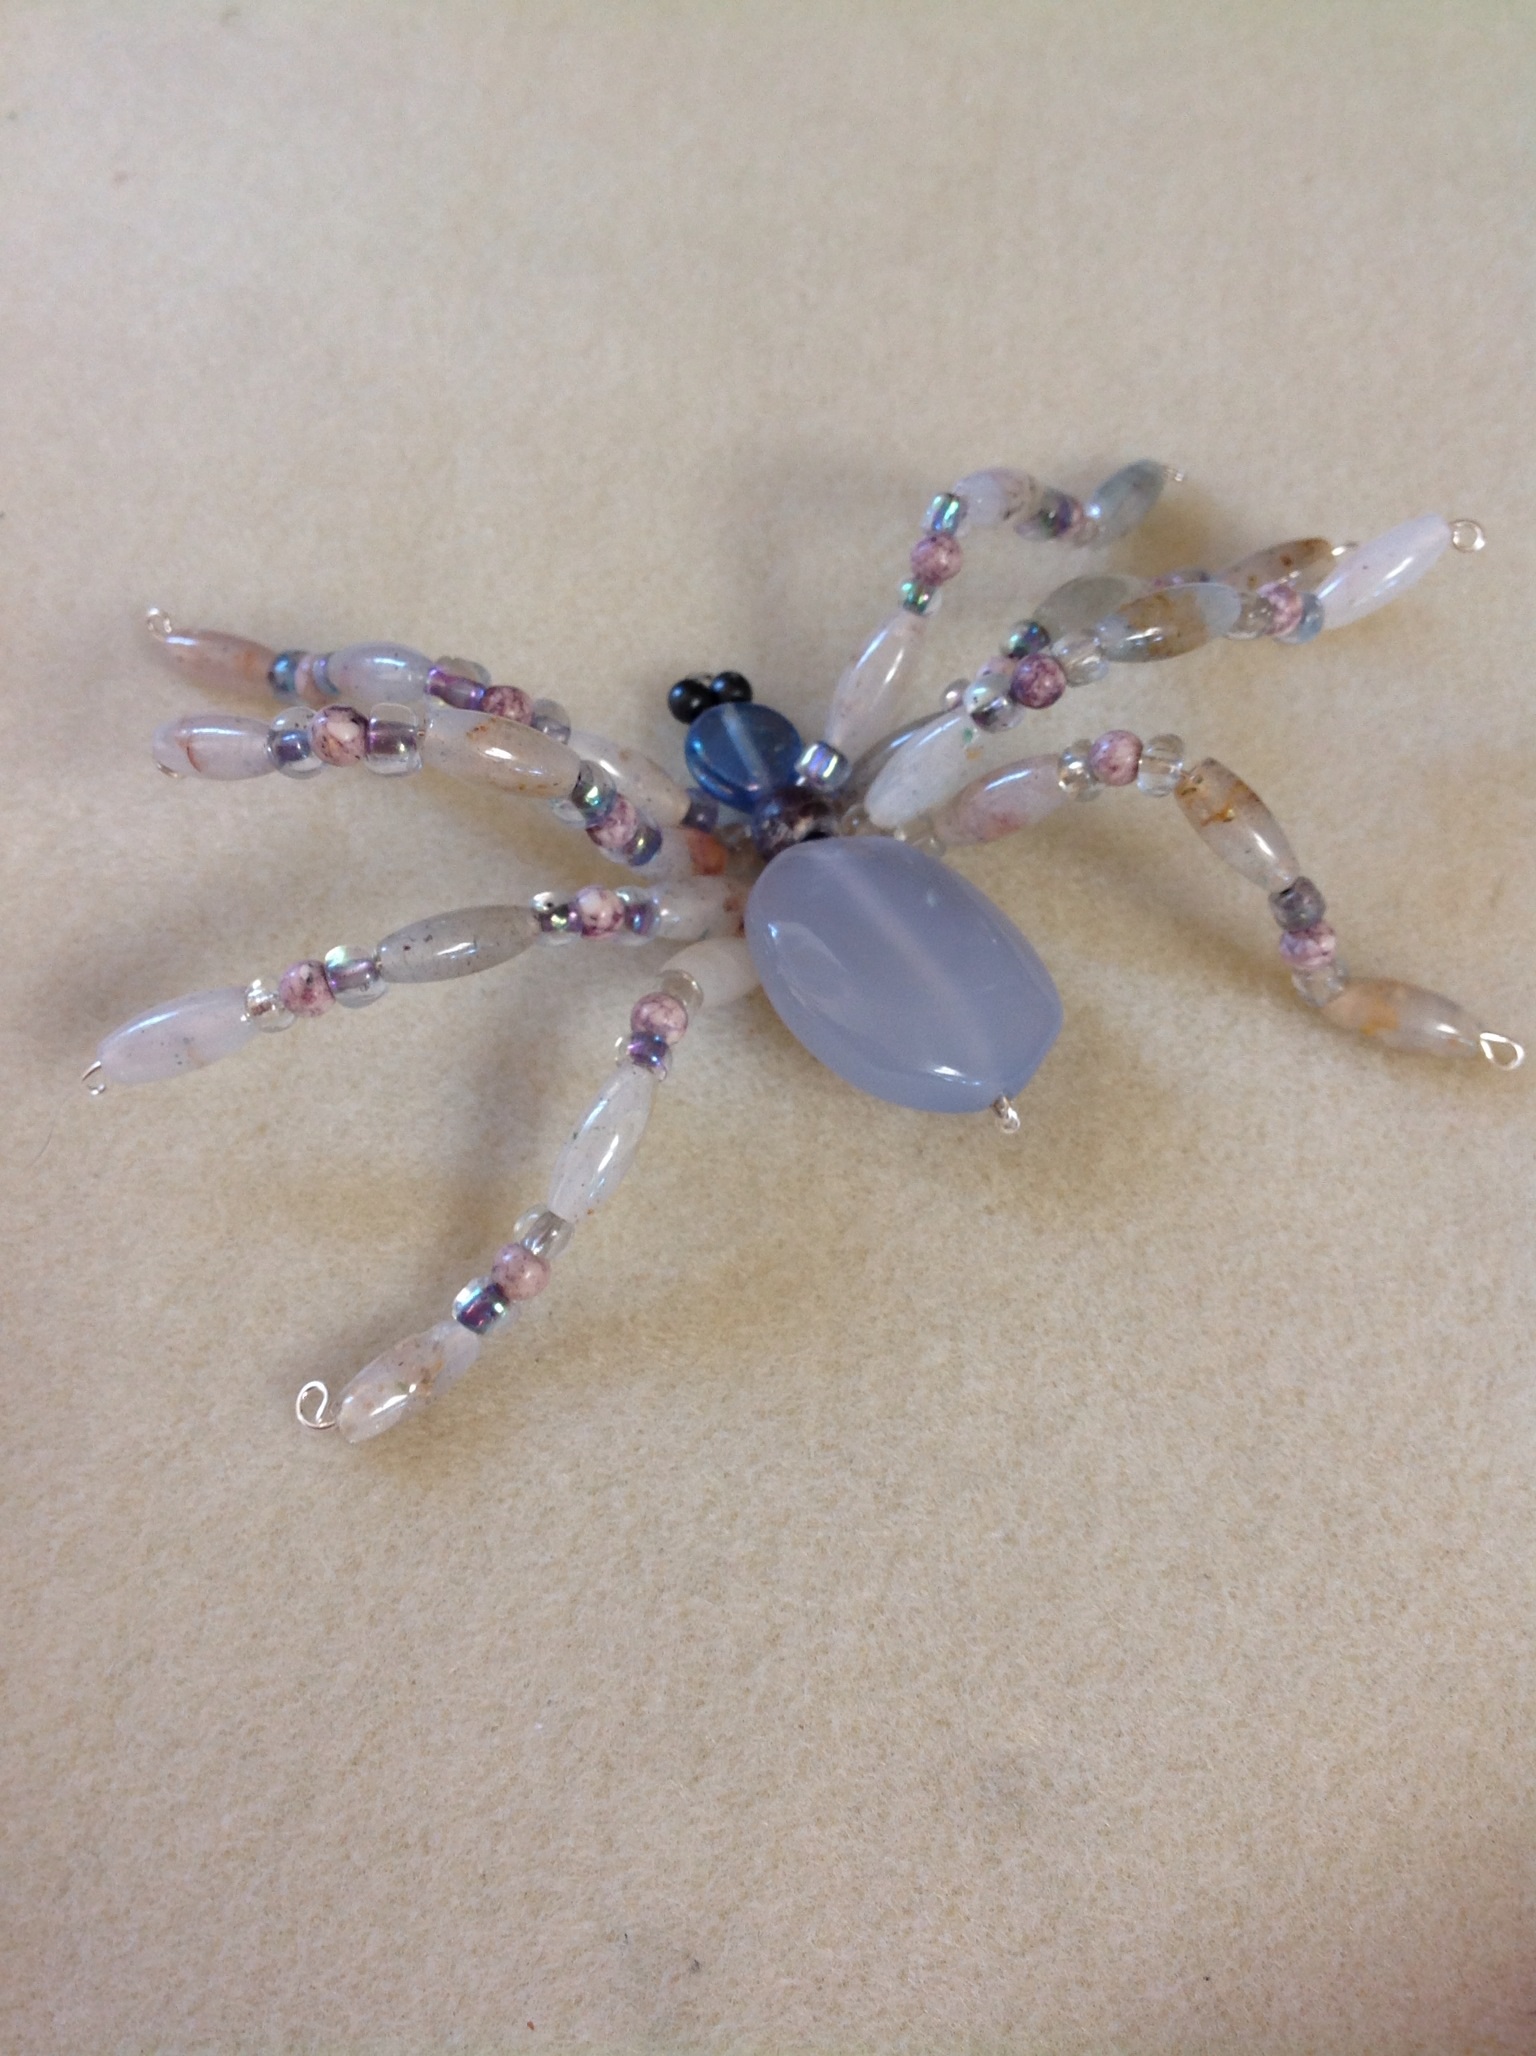 I have started to wear my spider pins to work. I enjoy wearing them the month of October leading up to the grand finale of Halloween!! Which of course, I wear as many as I can at one time without looking too crazy. I have a few other types of brooches and earrings that resemble skeletons, witches and ghosts. But, nothing has the impact of the spider brooch. I have started making jewelry, mostly necklaces and bracelets. I have branched out with earrings which are fun but I have always shied away from brooches. They looked hard to make and it seemed so personal to make a piece of jewelry that someone puts on their chest or shoulder. Very intimate to me. More intimate than the ears, neck or arm. WHY? Who knows why? I surely don’t… Here is my first attempt at a spider brooch. I think it came out cute and lead me to try couple more styles. I feel an obsession starting again.
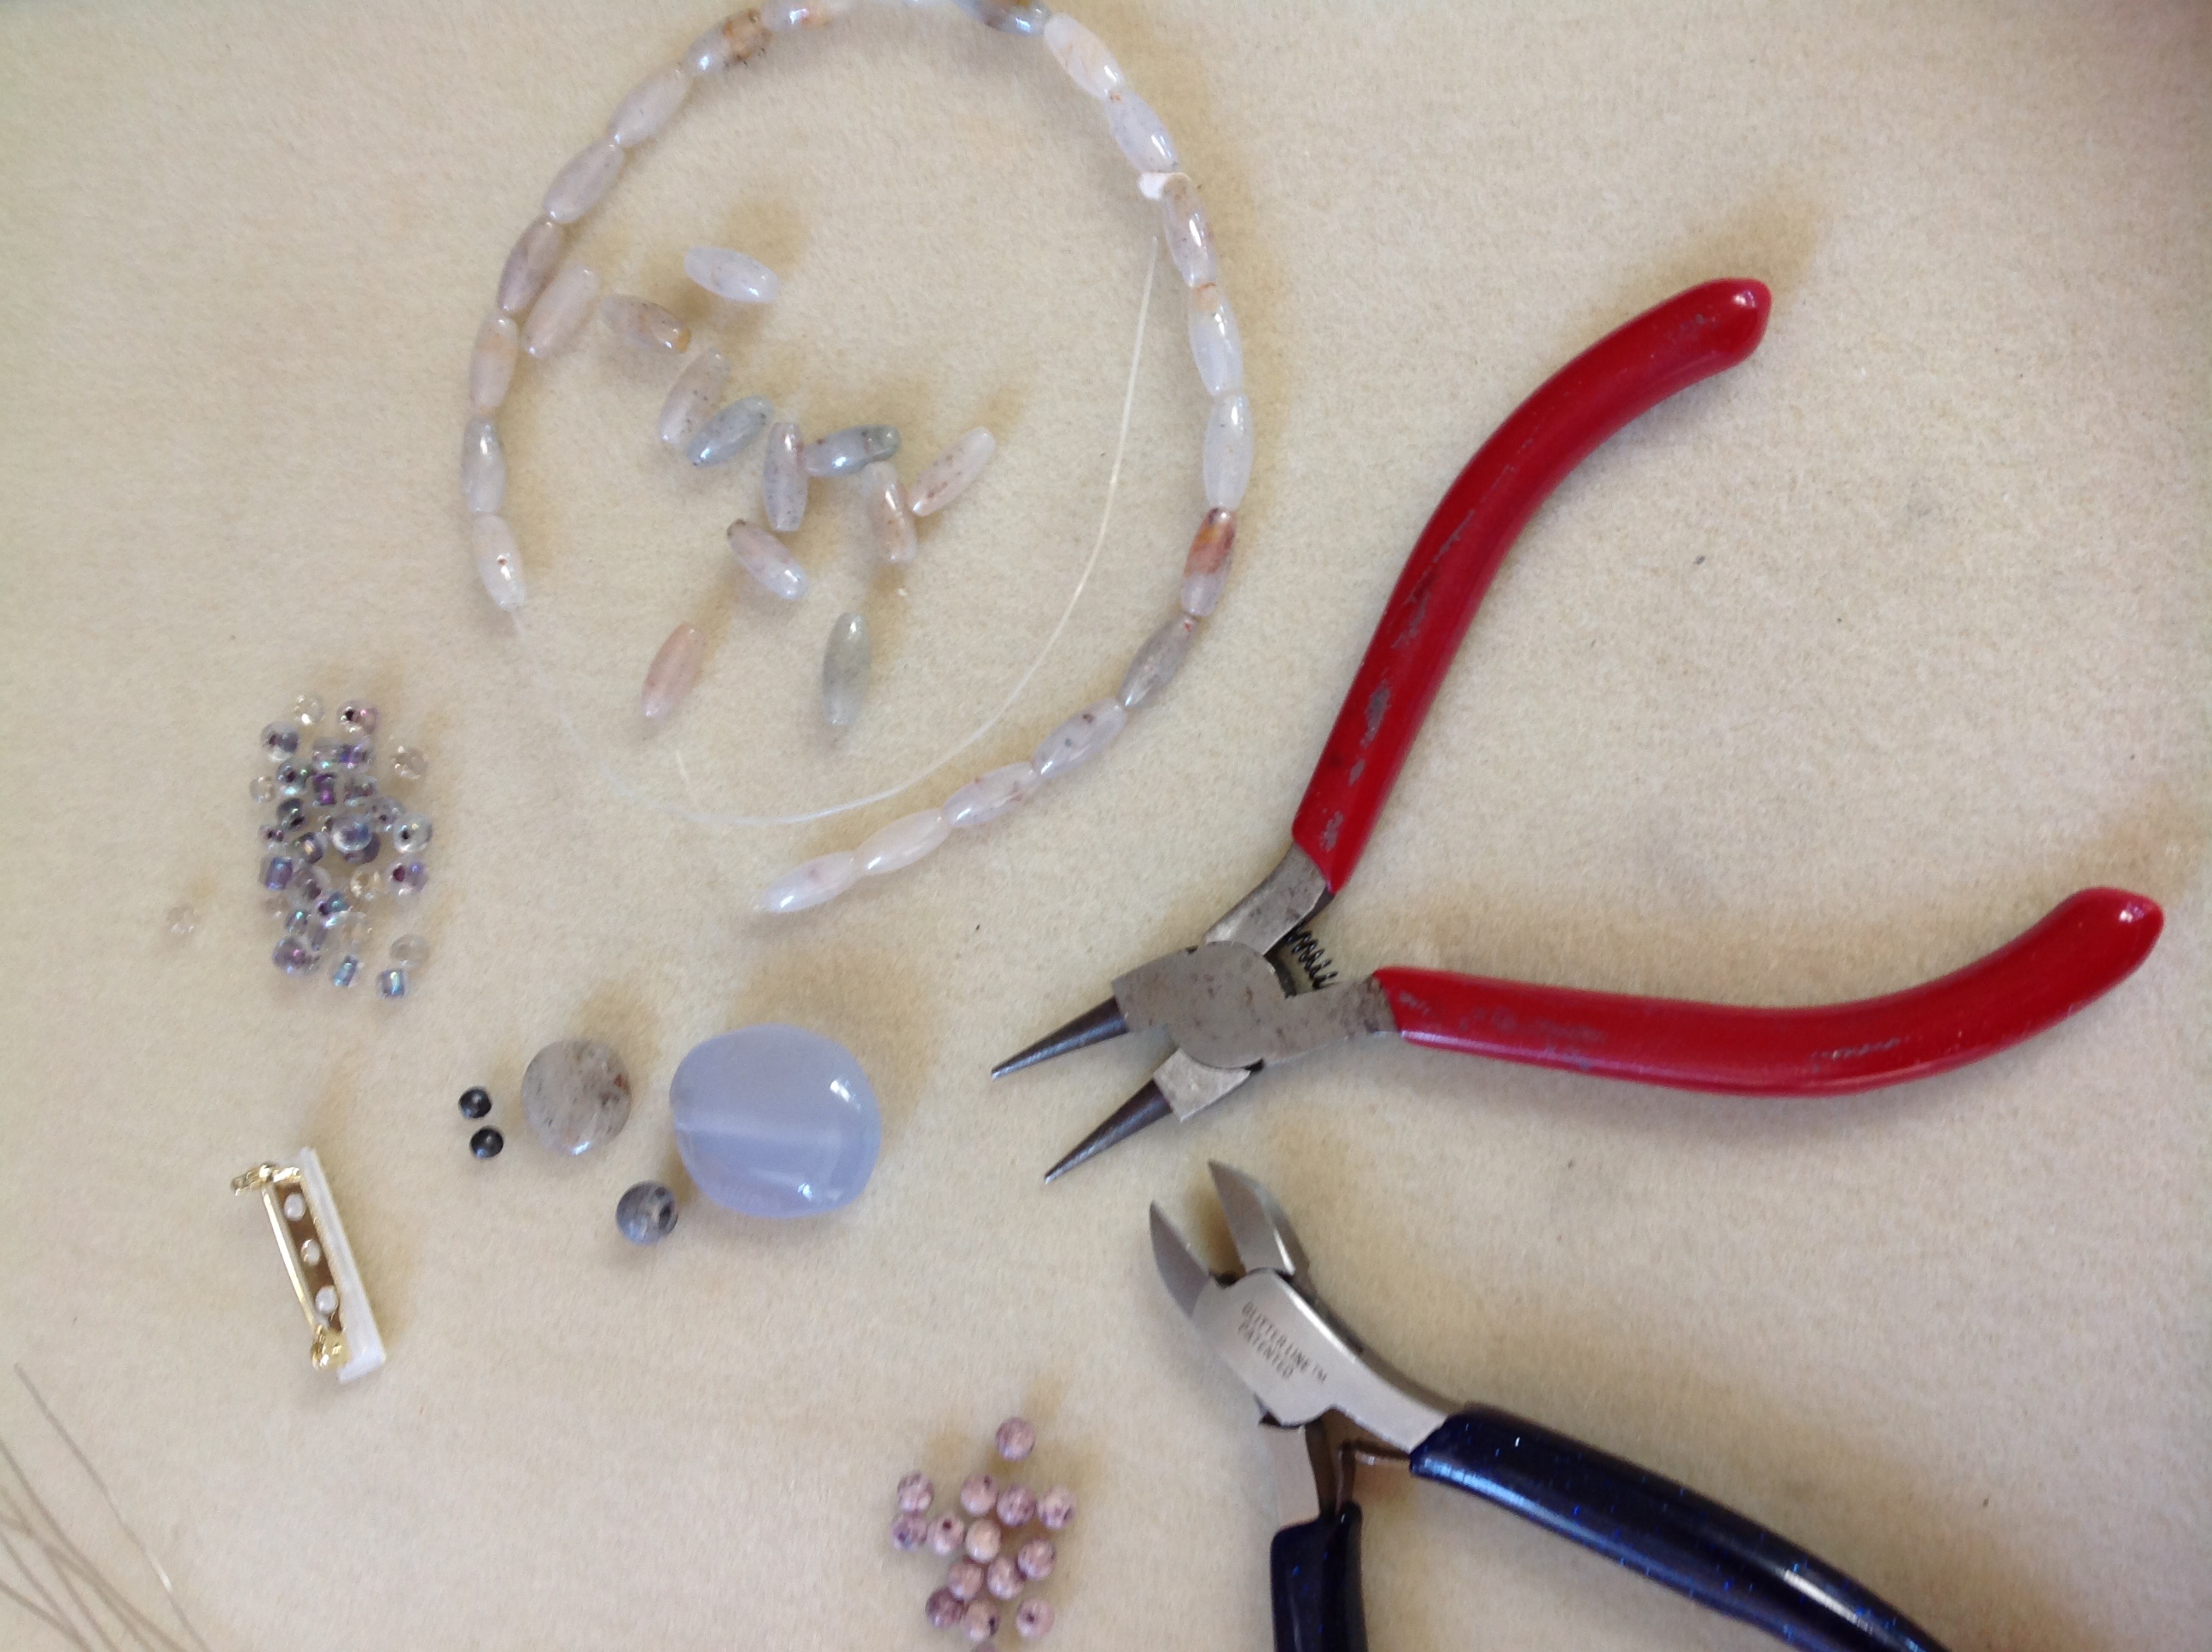
Supply List
2 small beads for eyes (I like black or dark eyes)
2 focal beads (1 is for the spider body and the other is for the head)
1 rondelle bead (bead shaped like a donut or a smaller bead than the head)
5 pieces of 22 or 24 gauge wire (cut into 6″ pieces)
Beads for the legs (I used 24 long beads, 40 clear seed beads and 24 small lavender beads
craft glue for a clasp on the back
Tools
wire cutters
round nose pliers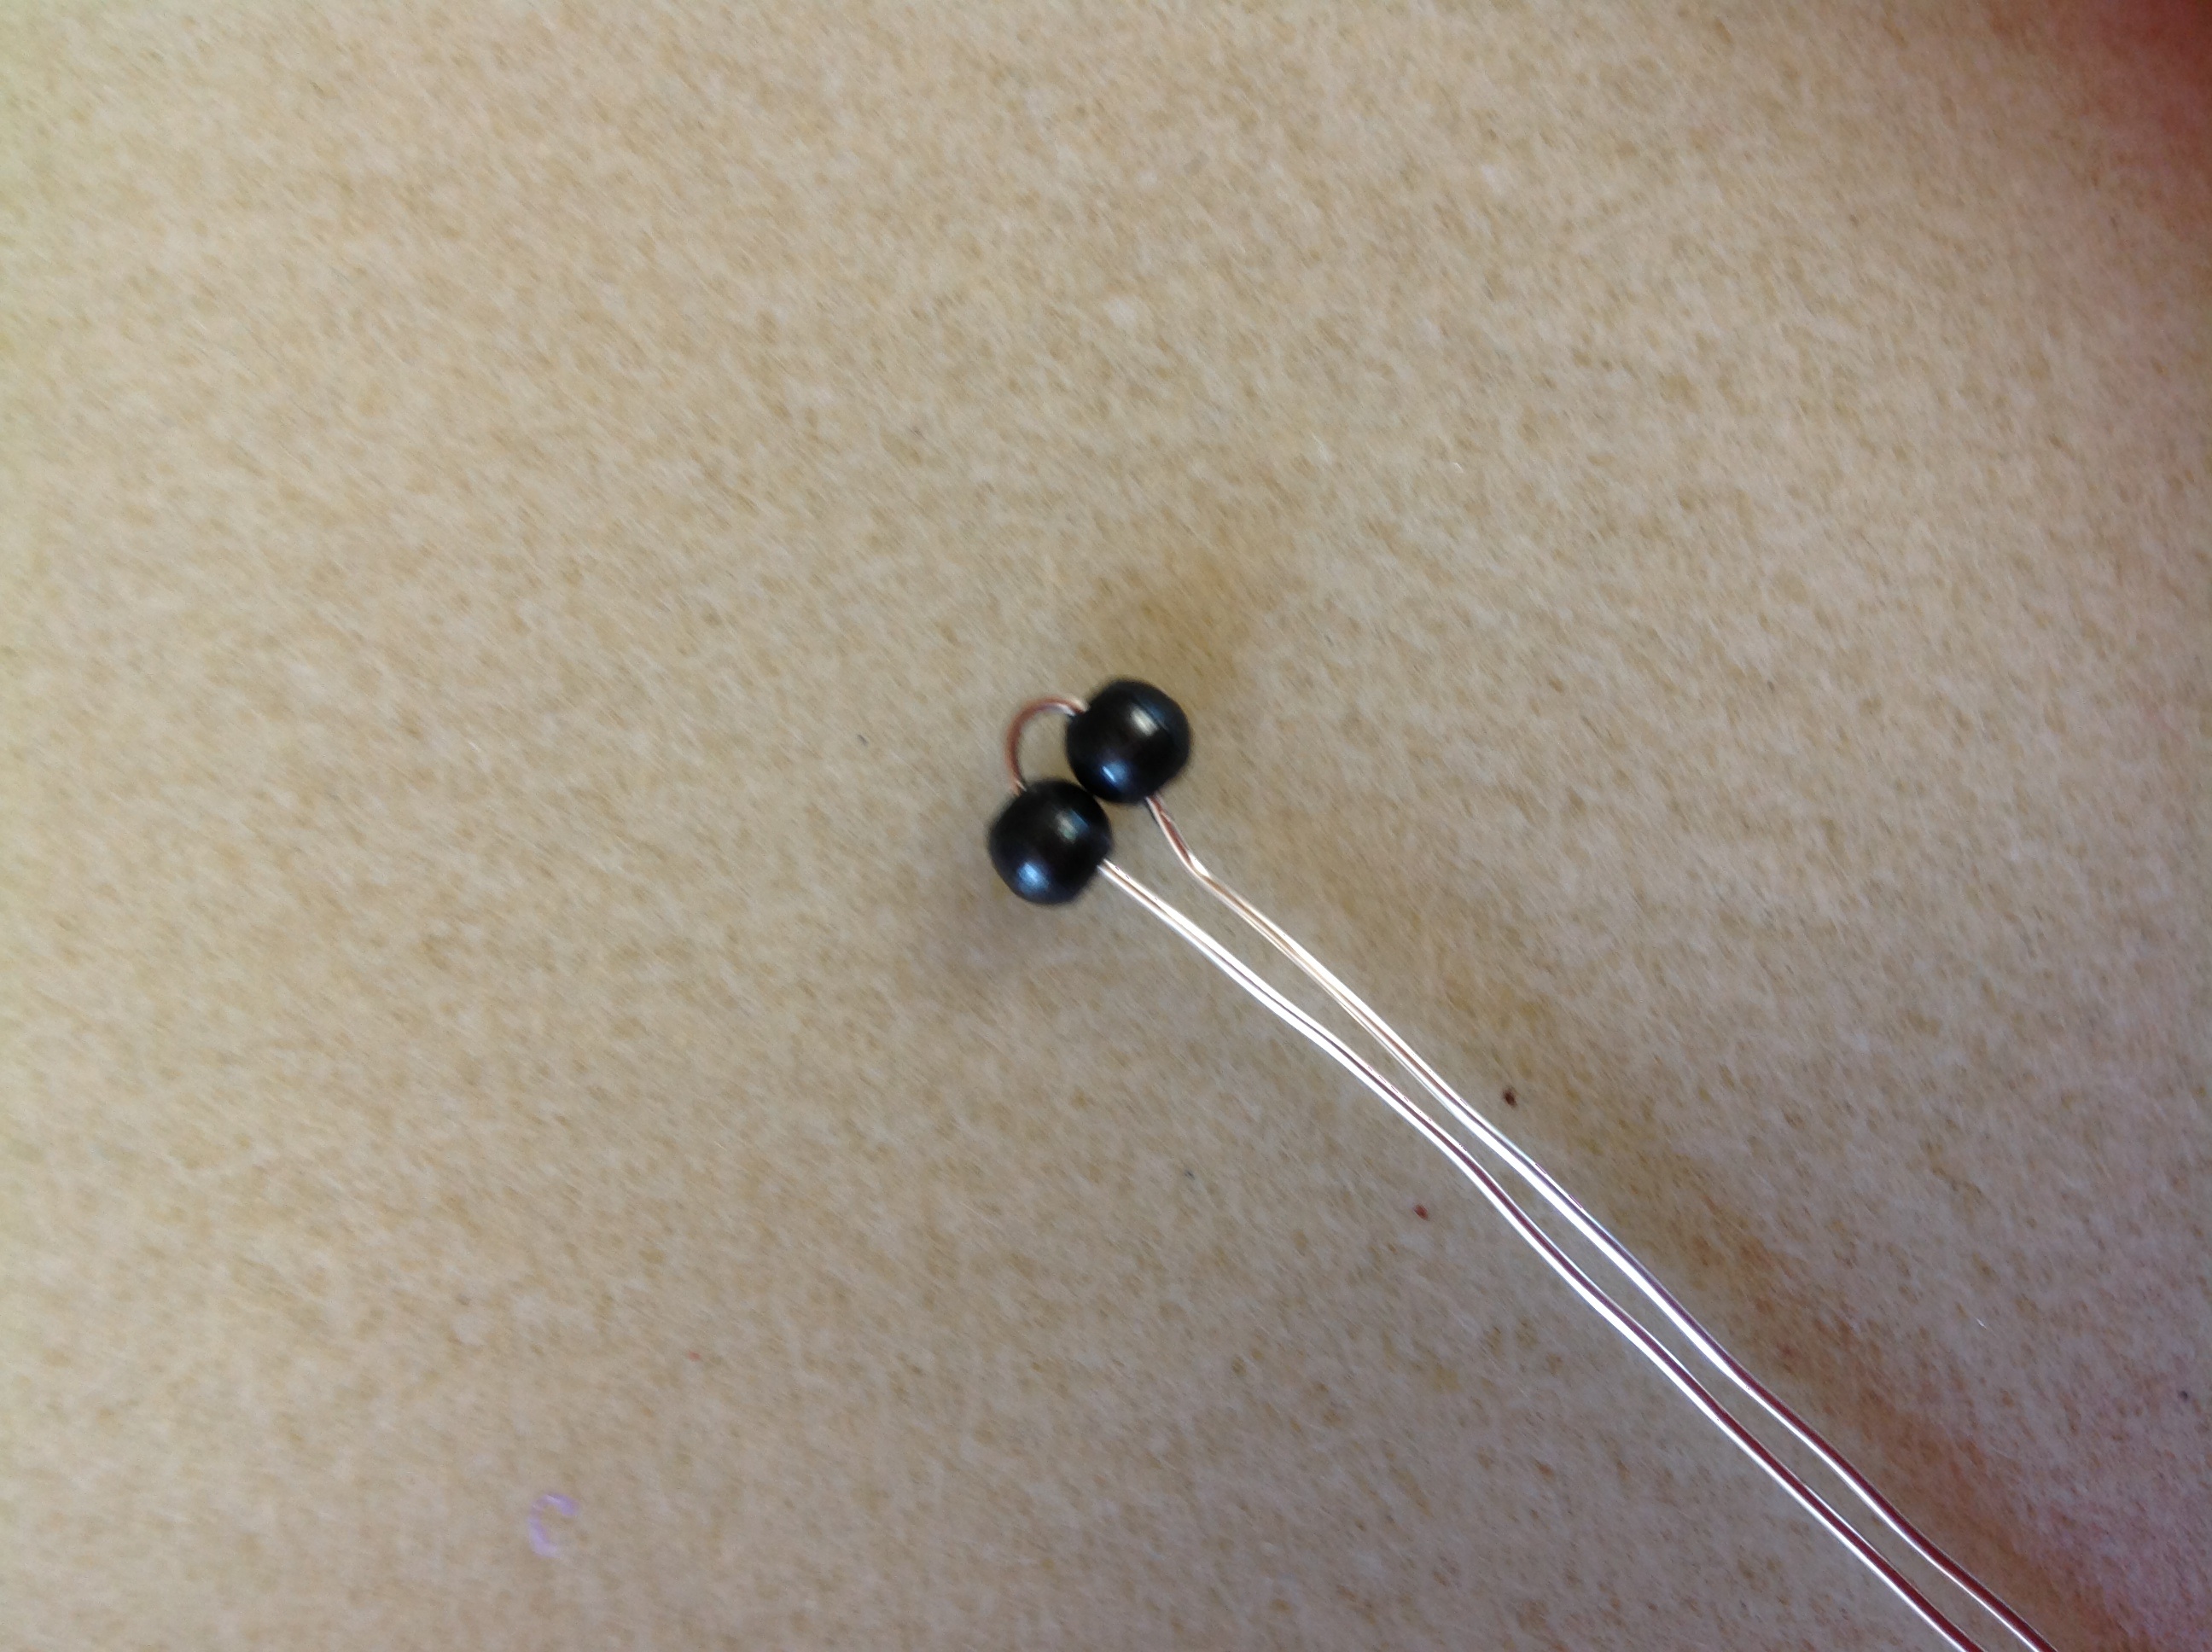
Directions
1. Take one of the wires and slip the eye beads into the center of the wire and fold into half. Smooth the wires together so that you can slide the head bead, the spacer bead and the body bead on to the wires. Failure Alert: Check to make sure that your beads will slide on a double wire. I learned this the hard way and to choose new beads and now a different spider! After sliding the beads on cut the wire 1/4″ long and use the round pliers to curl the wire and make a tight loop that the beads will not fall off. (This is easier than it sounds. It is like using a curling iron.)
2. Take 2 of the remaining wires and wrap and twist them around the spider’s body in front of the spacer bead, right below the head. Take the last 2 wires and wrap them below the spacer bead and above the body. ( Think of a trash bag twister ties, same thing!) By Golly, we have legs!! (Failure Alert: Spiders have 8 legs)
3. Decide on a bead pattern for the legs. Repeat the same pattern on the legs. I used 3 long beads 3 lavender beads and 5 seed beads per leg. Feed the beads on to the wire and cut the wire 1/4″ long and once again curl the wire tightly until the beads are fitting snuggly on the leg. Repeats this until you have 8 legs.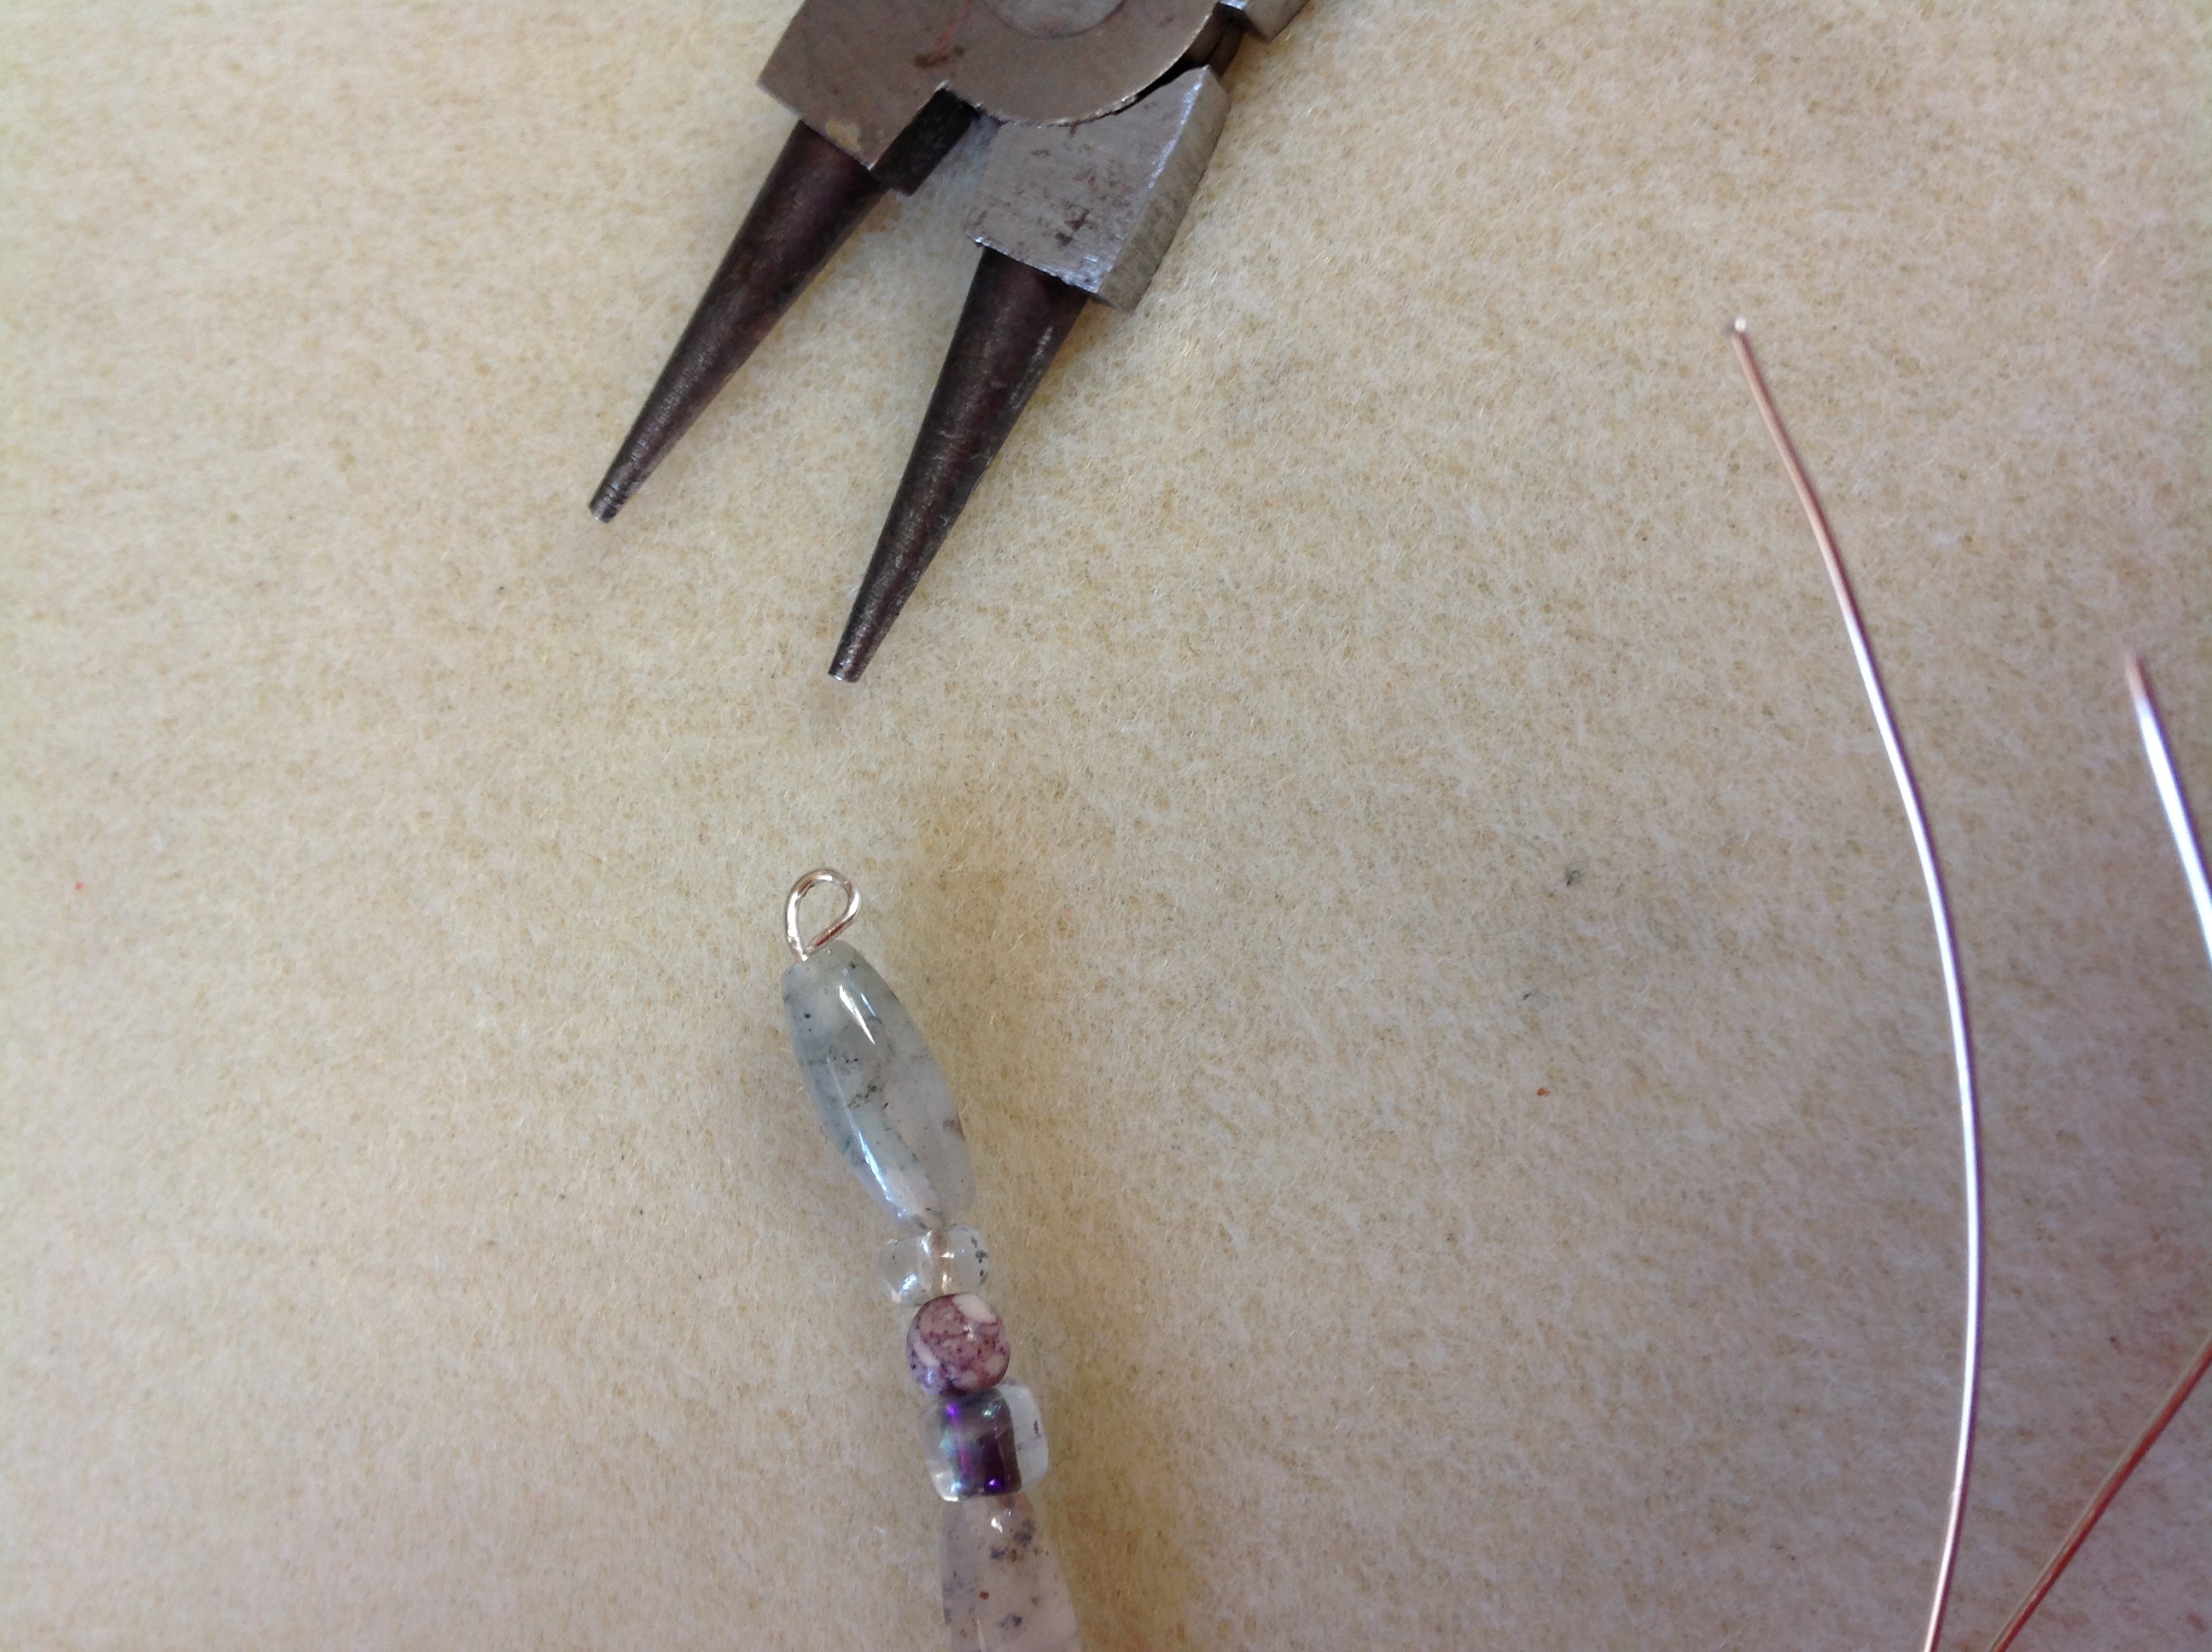
4. Bend the legs to look like upside down letter C. Well like spider legs!!
5. Glue a C clasp on the back using superglue or E6000 or a good craft glue. Dry overnight.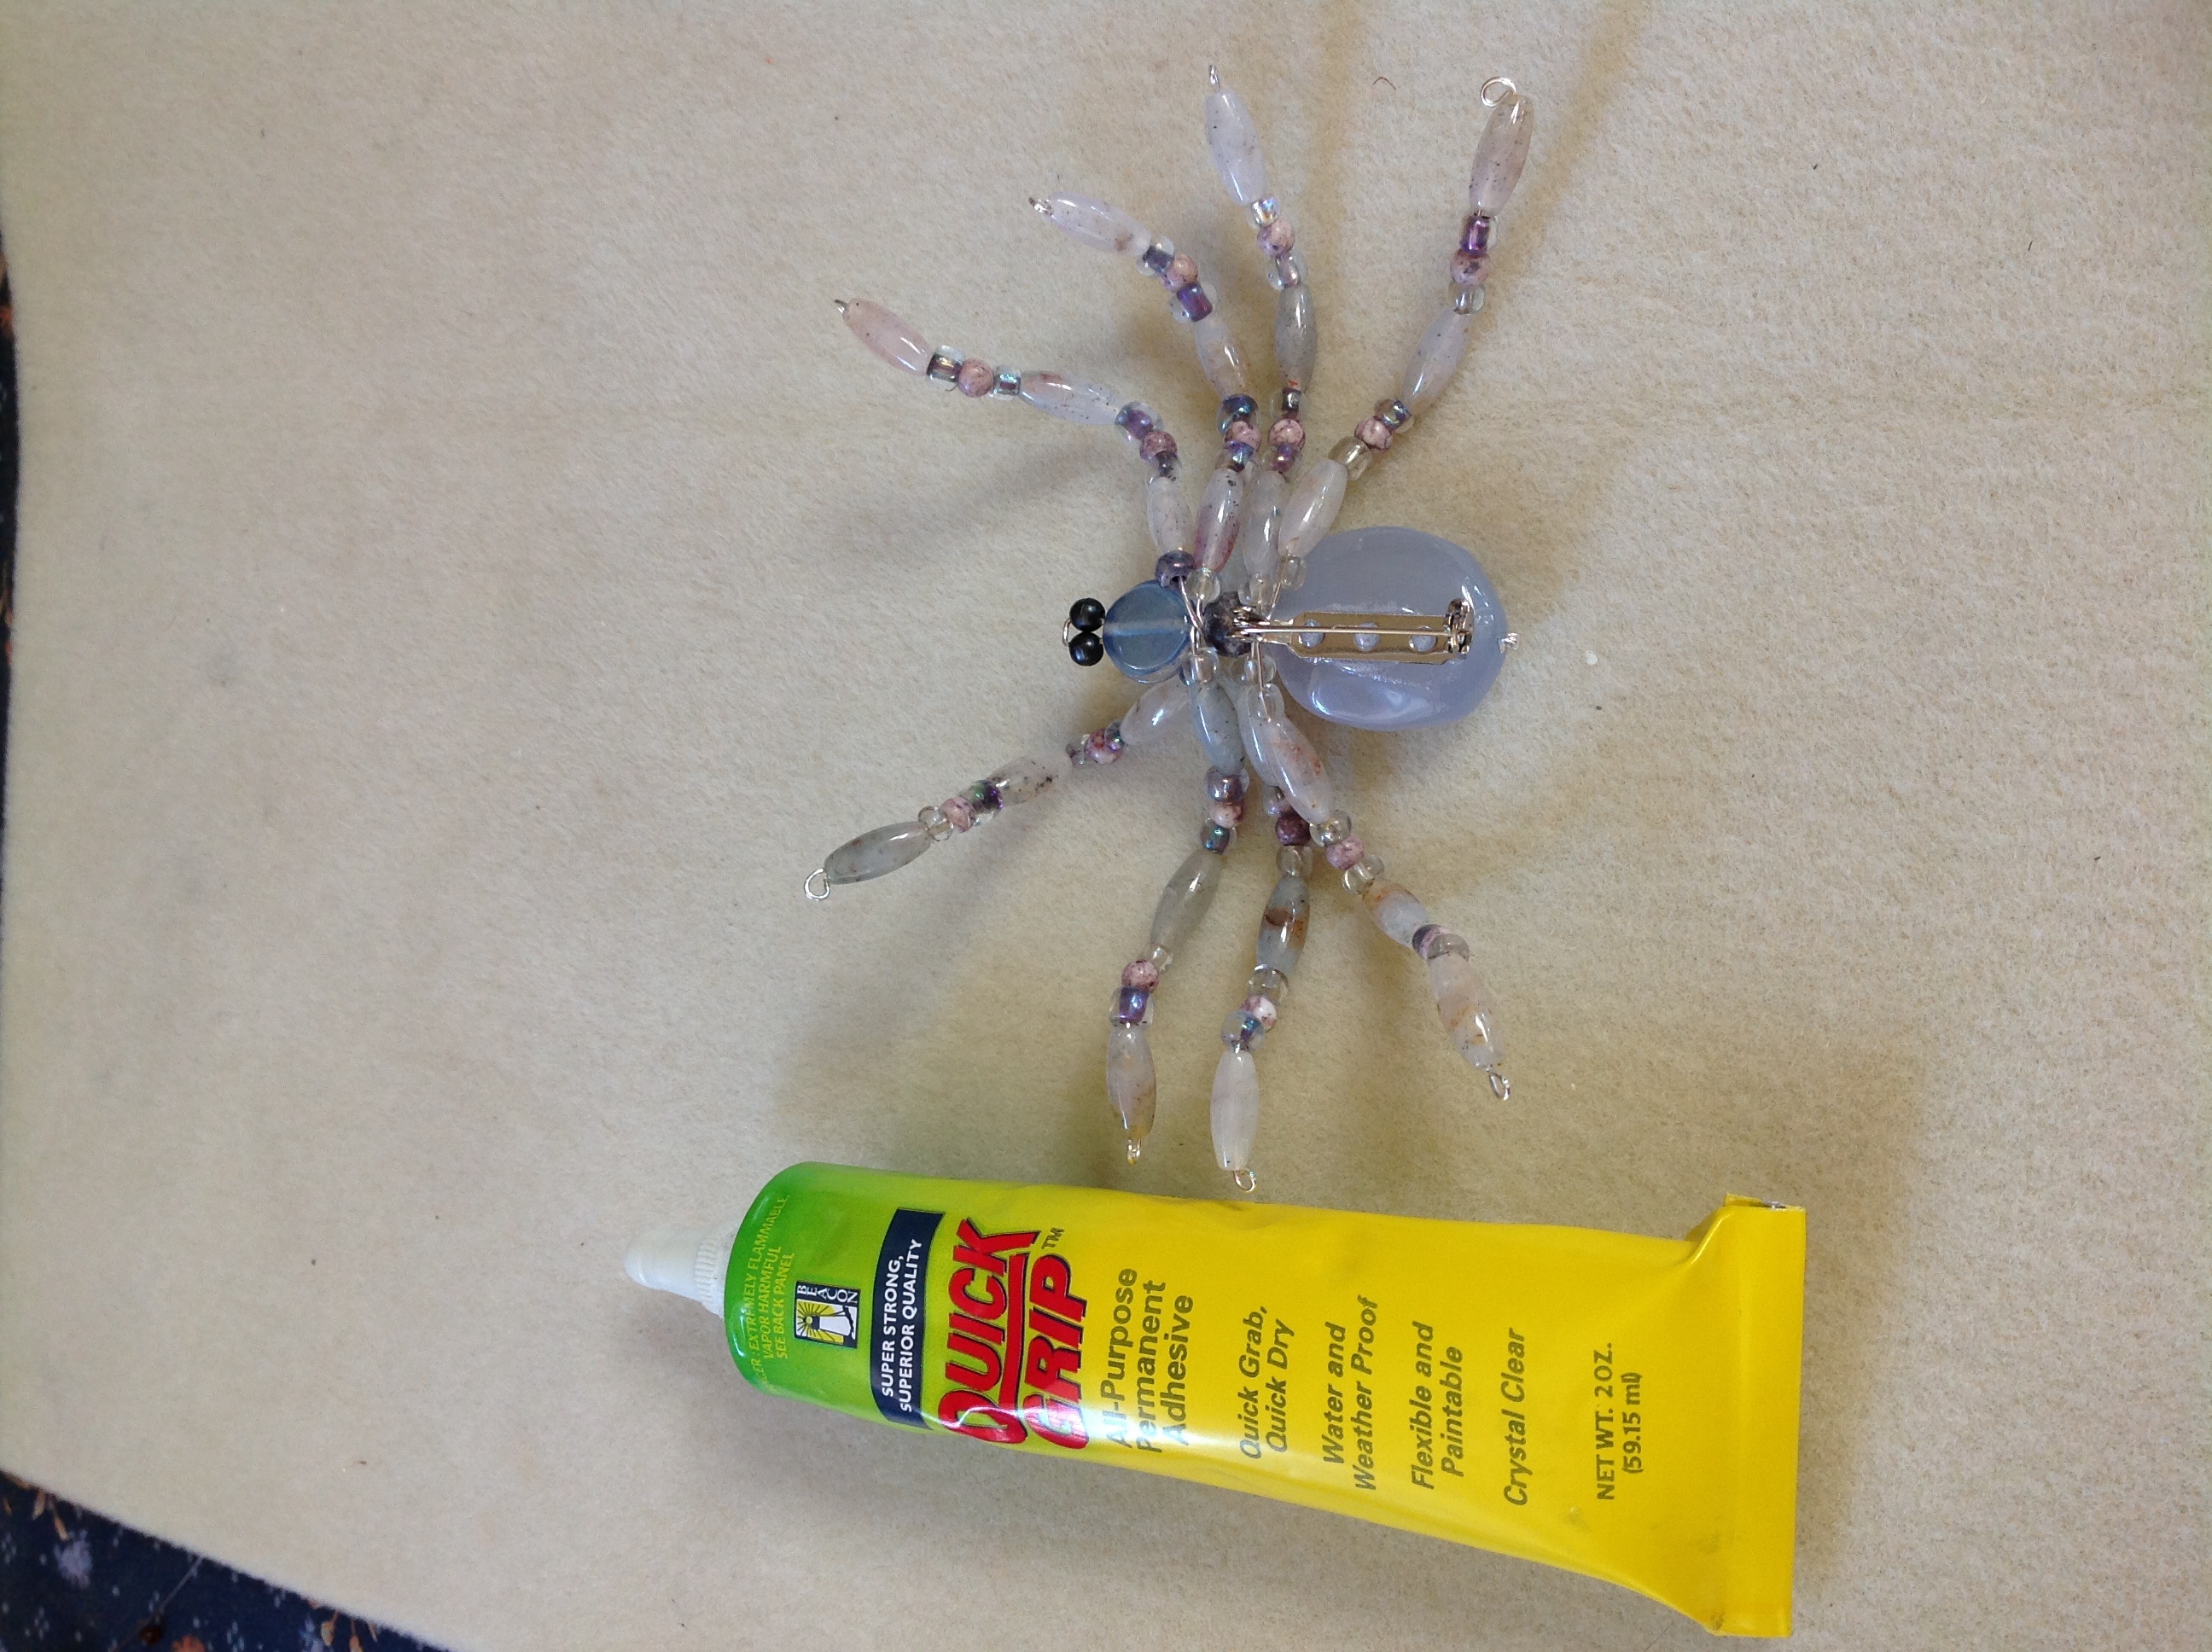
6. Wear and enjoy your spider brooch. This is a low cost project and very easy too make which led to me making a couple more. In fact, I am going to try to make spider earrings and a necklace.
Happy Halloween Cindy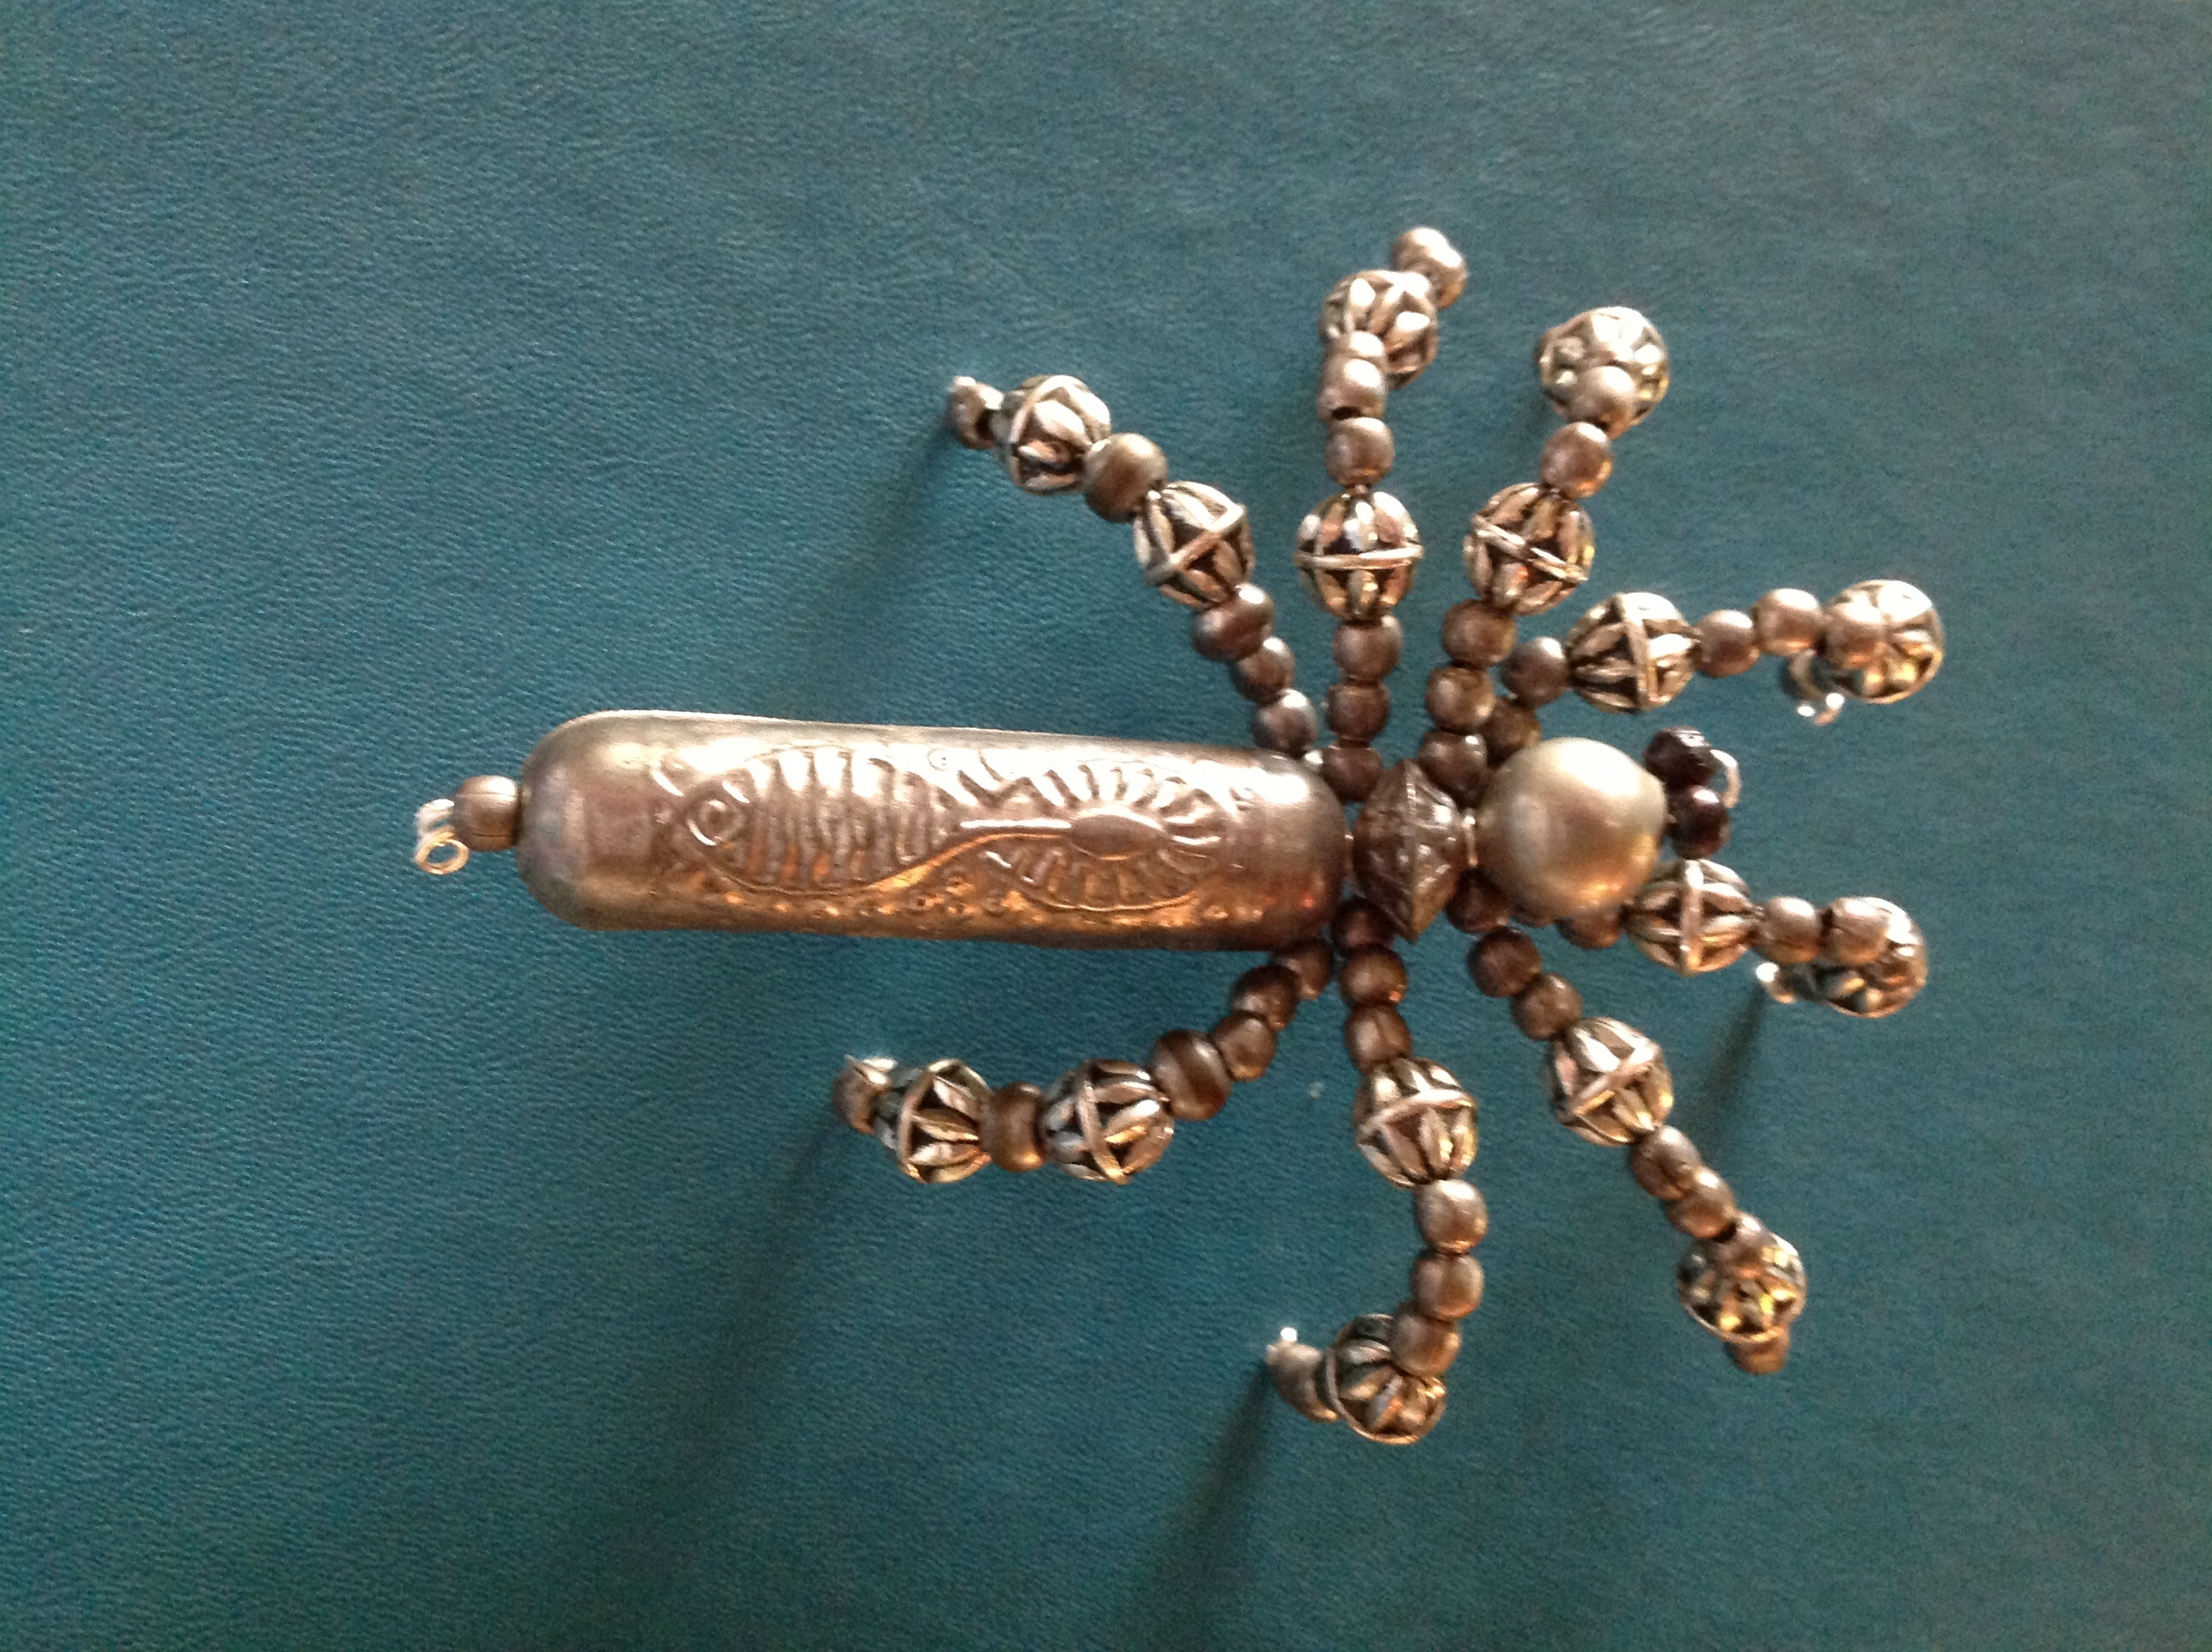

Hi everyone , I’m Eva Mccarthy.
Welcome to my website . I started writing in middle school after a creative writing assignment for my English teacher. I did creative writing for a while before I thought about doing something else.
I had always loved doing research assignments because I’m passionate about learning. When you combine writing skill with a love of learning, research paper writing only makes sense as a job.
I’m passionate about assisting the students of the future in their school career. When they get too busy, I am there to help.
Eva Mccarthy – Professional Academic Writer – tritronicsinc.com Corp