
How to Make a Vintage Halloween Candy Container
The Germans made the first candy containers in the 1920’s and 1930’s, up to World War II. They sold them in America in the dime stores such as Woolworth’s. As any Halloween collector knows, they have become incredibly expensive. I own one. Thats it. One. I will never tell you how much I spent for it because my husband reads my blog. A lot of companies make very cute reproductions which we sell at Canterbury Gardens but I thought it would be fun to make one from scratch. This is a great project for kids. It involves a balloon, newspaper, glue and paint. Very messy!! Very Fun!! Let’s get started. Supply list is at the end of the blog.
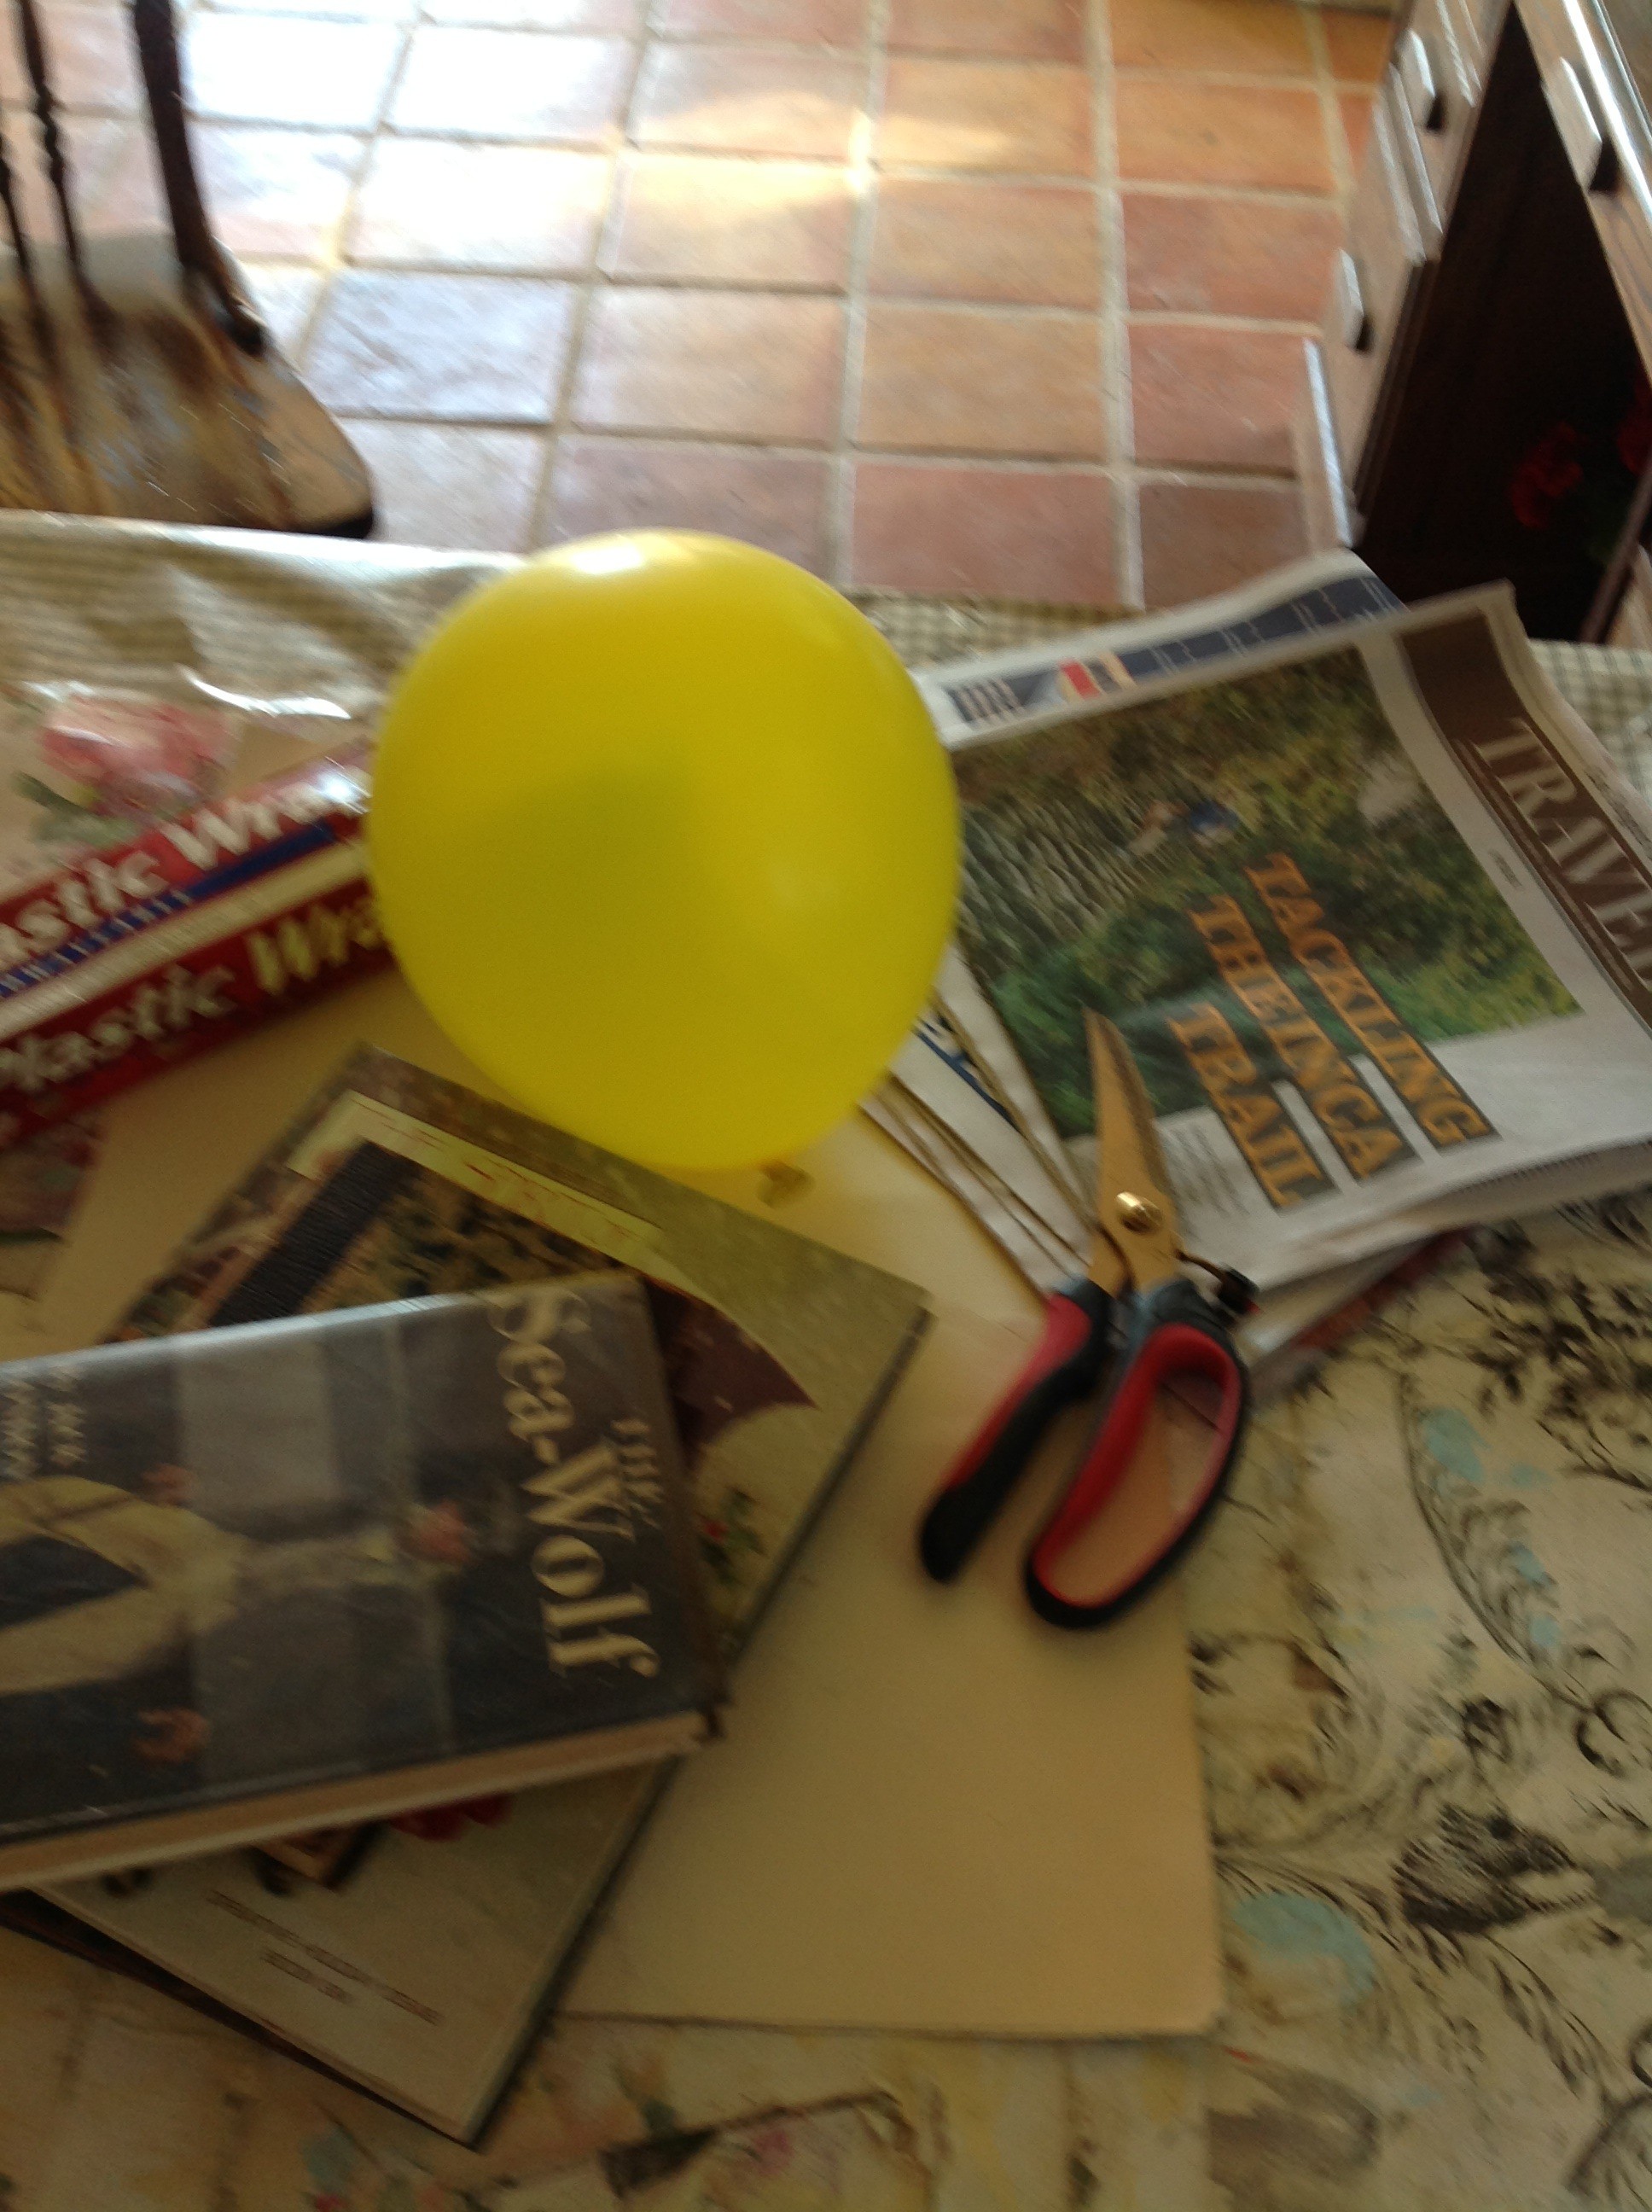
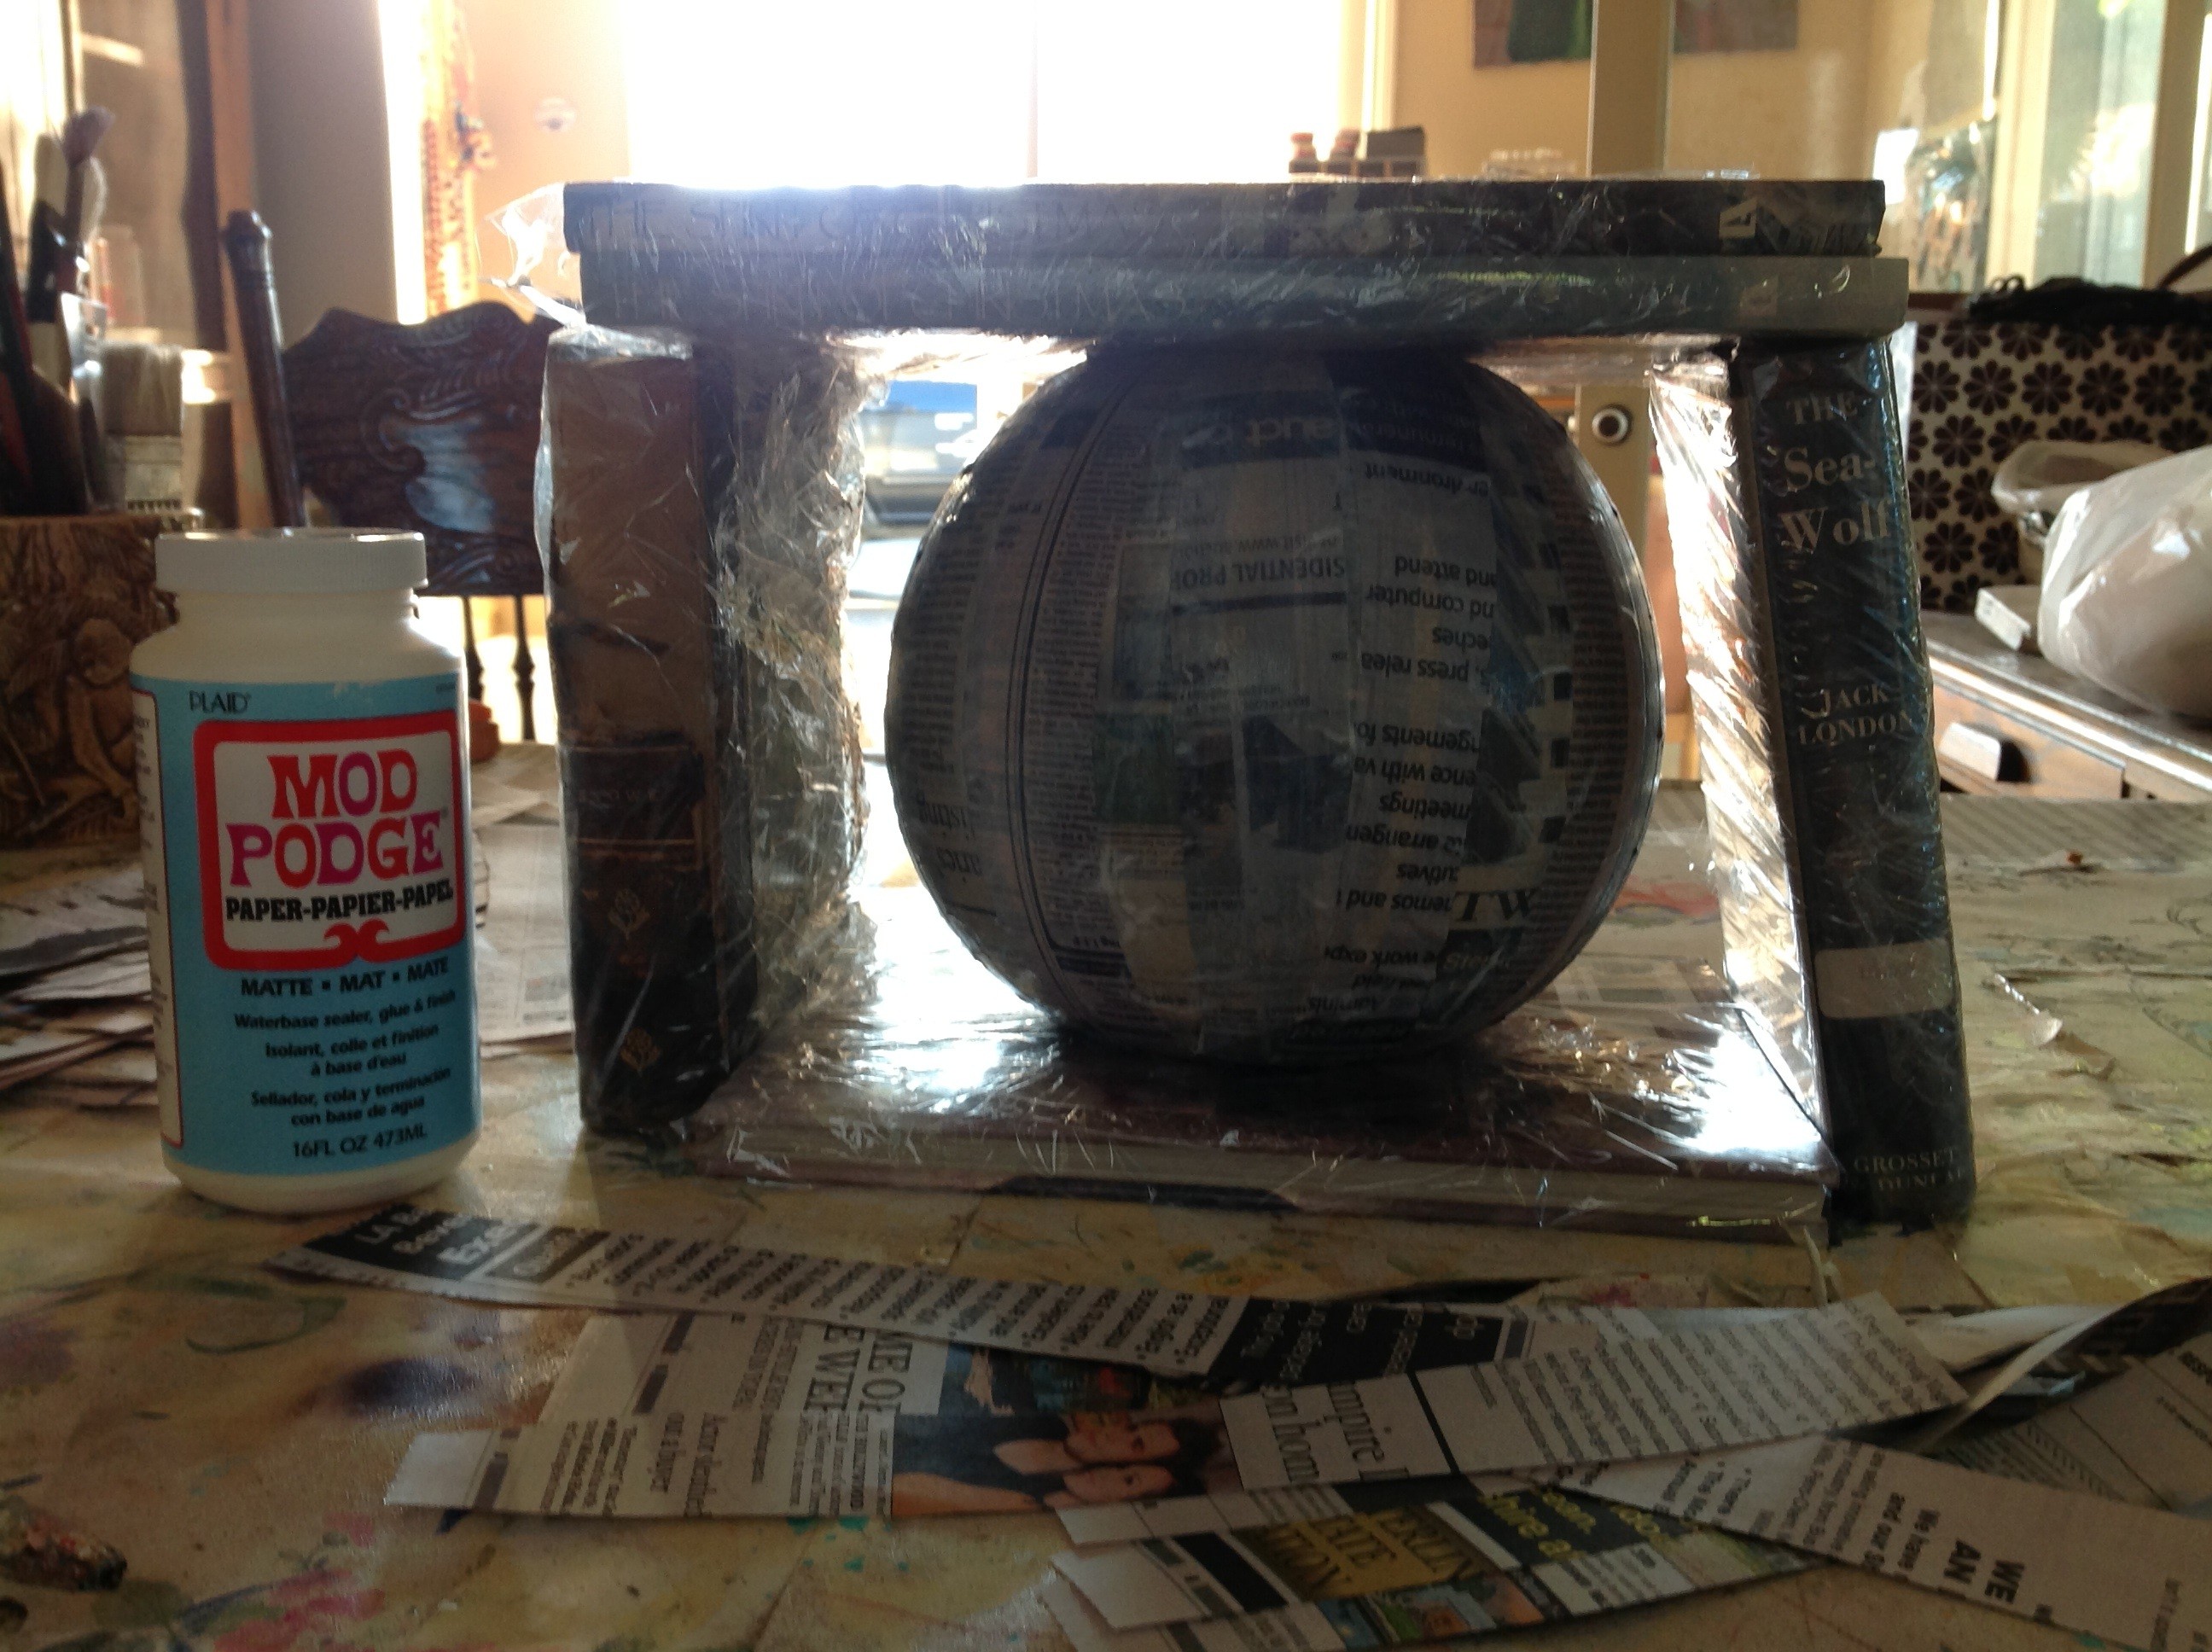
Step One: Blow up balloon about the size of a cantalope. The old ones were really very small about the size of a navel orange. Candy must of been expensive or the children were smaller. Anyways, start cutting newspaper into strips about an inch wide and 10 inches long. You are going to need a lot of them. Enough to cover the balloon 7 layers. Now, cover 5 books with Saran Wrap. See photo. Cover balloon with a light coat of Mod Podge Paper Mache Glue. Buy this at Michael’s Craft Store. Now start glueing the paper strips on to the balloon by lightly coating one side of the newspaper with glue. FLOP ALERT It will take forever to dry if you use to much glue!! After covering the balloon with overlapping newspaper strips put it on a saran wrapped large book and weight it down with a larger book. See picture. ANOTHER FLOP ALERT Your have to do this after every layer of newspaper strips to be able to have a flat bottom. Let dry for 2 hours. Repeat 5 to 7 layers. I never said it was a quick project.
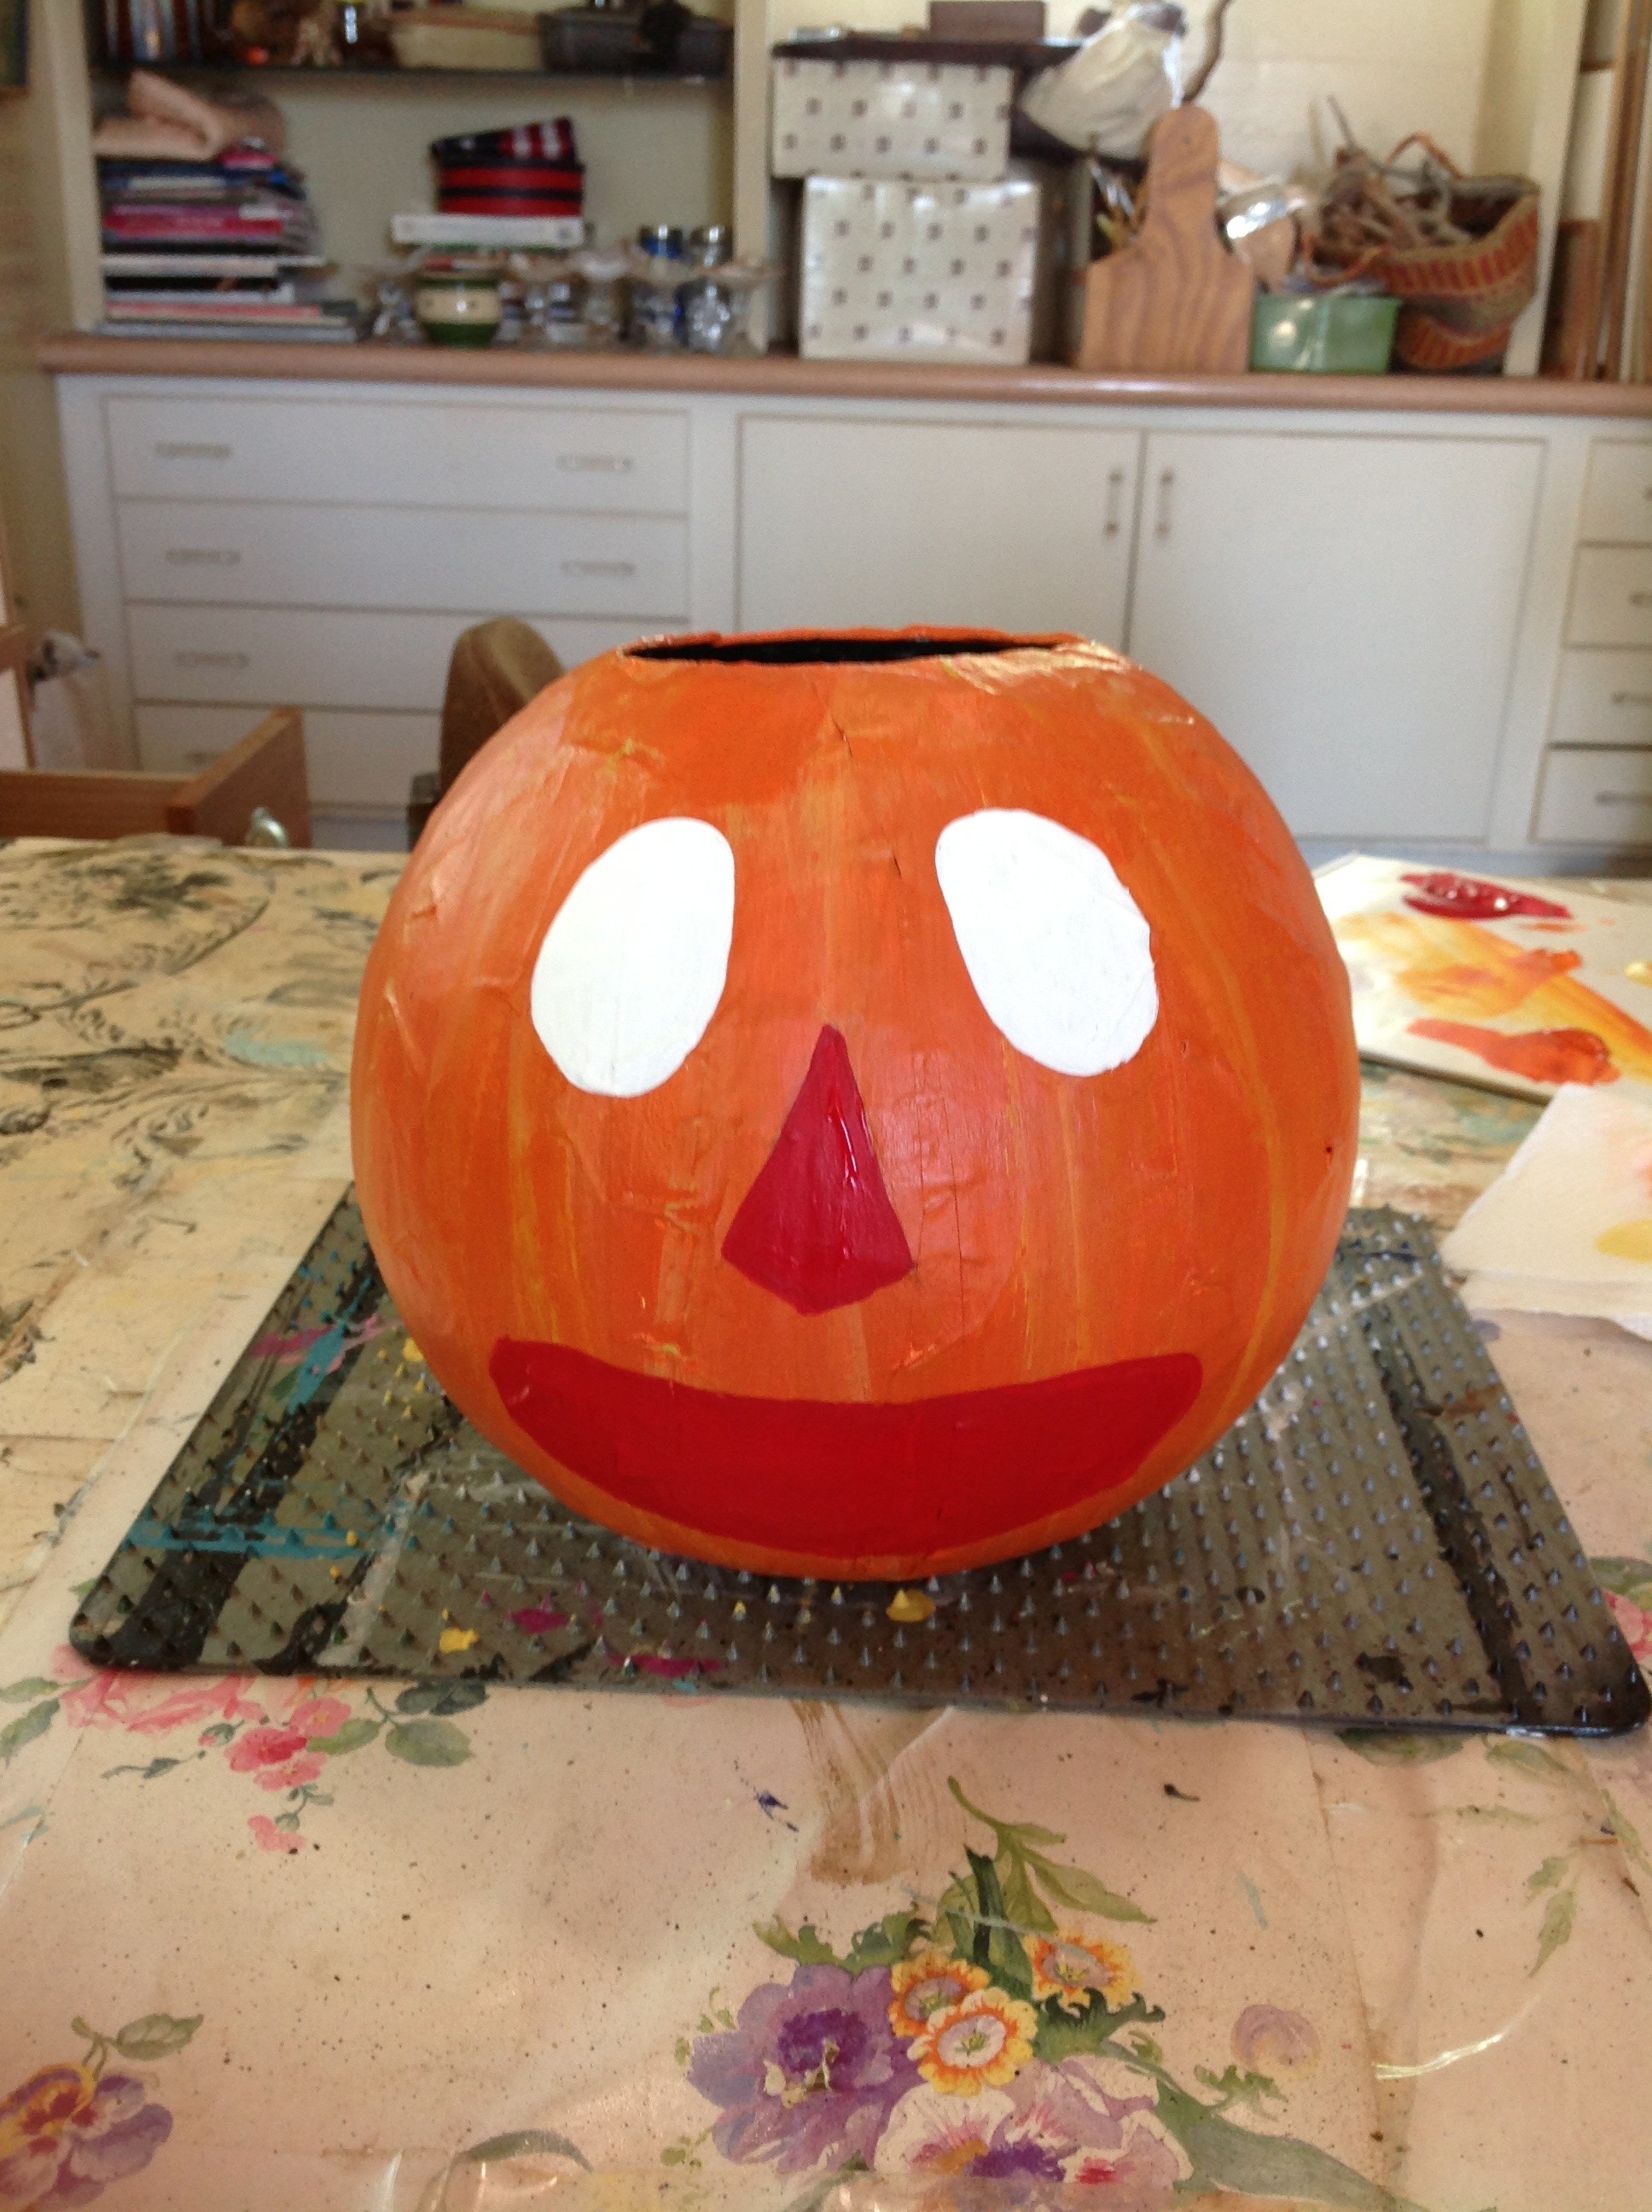
Step Two: Paint the balloon with some kind of sealer. I used Liquitex Gesso for acrylics because it smoothed out some of the paper bumps. Let dry. FLOP ALERT Snip the balloon knot off, cut a hole big enough for your hand to fit in, not your child’s hand because you want to be able to reach the candy bars. It was damp inside the container because the balloon stops it from drying completely. Take out the balloon and let the candy container dry over night. It will harden up. I promise. Push out the sides if you need to from the inside.

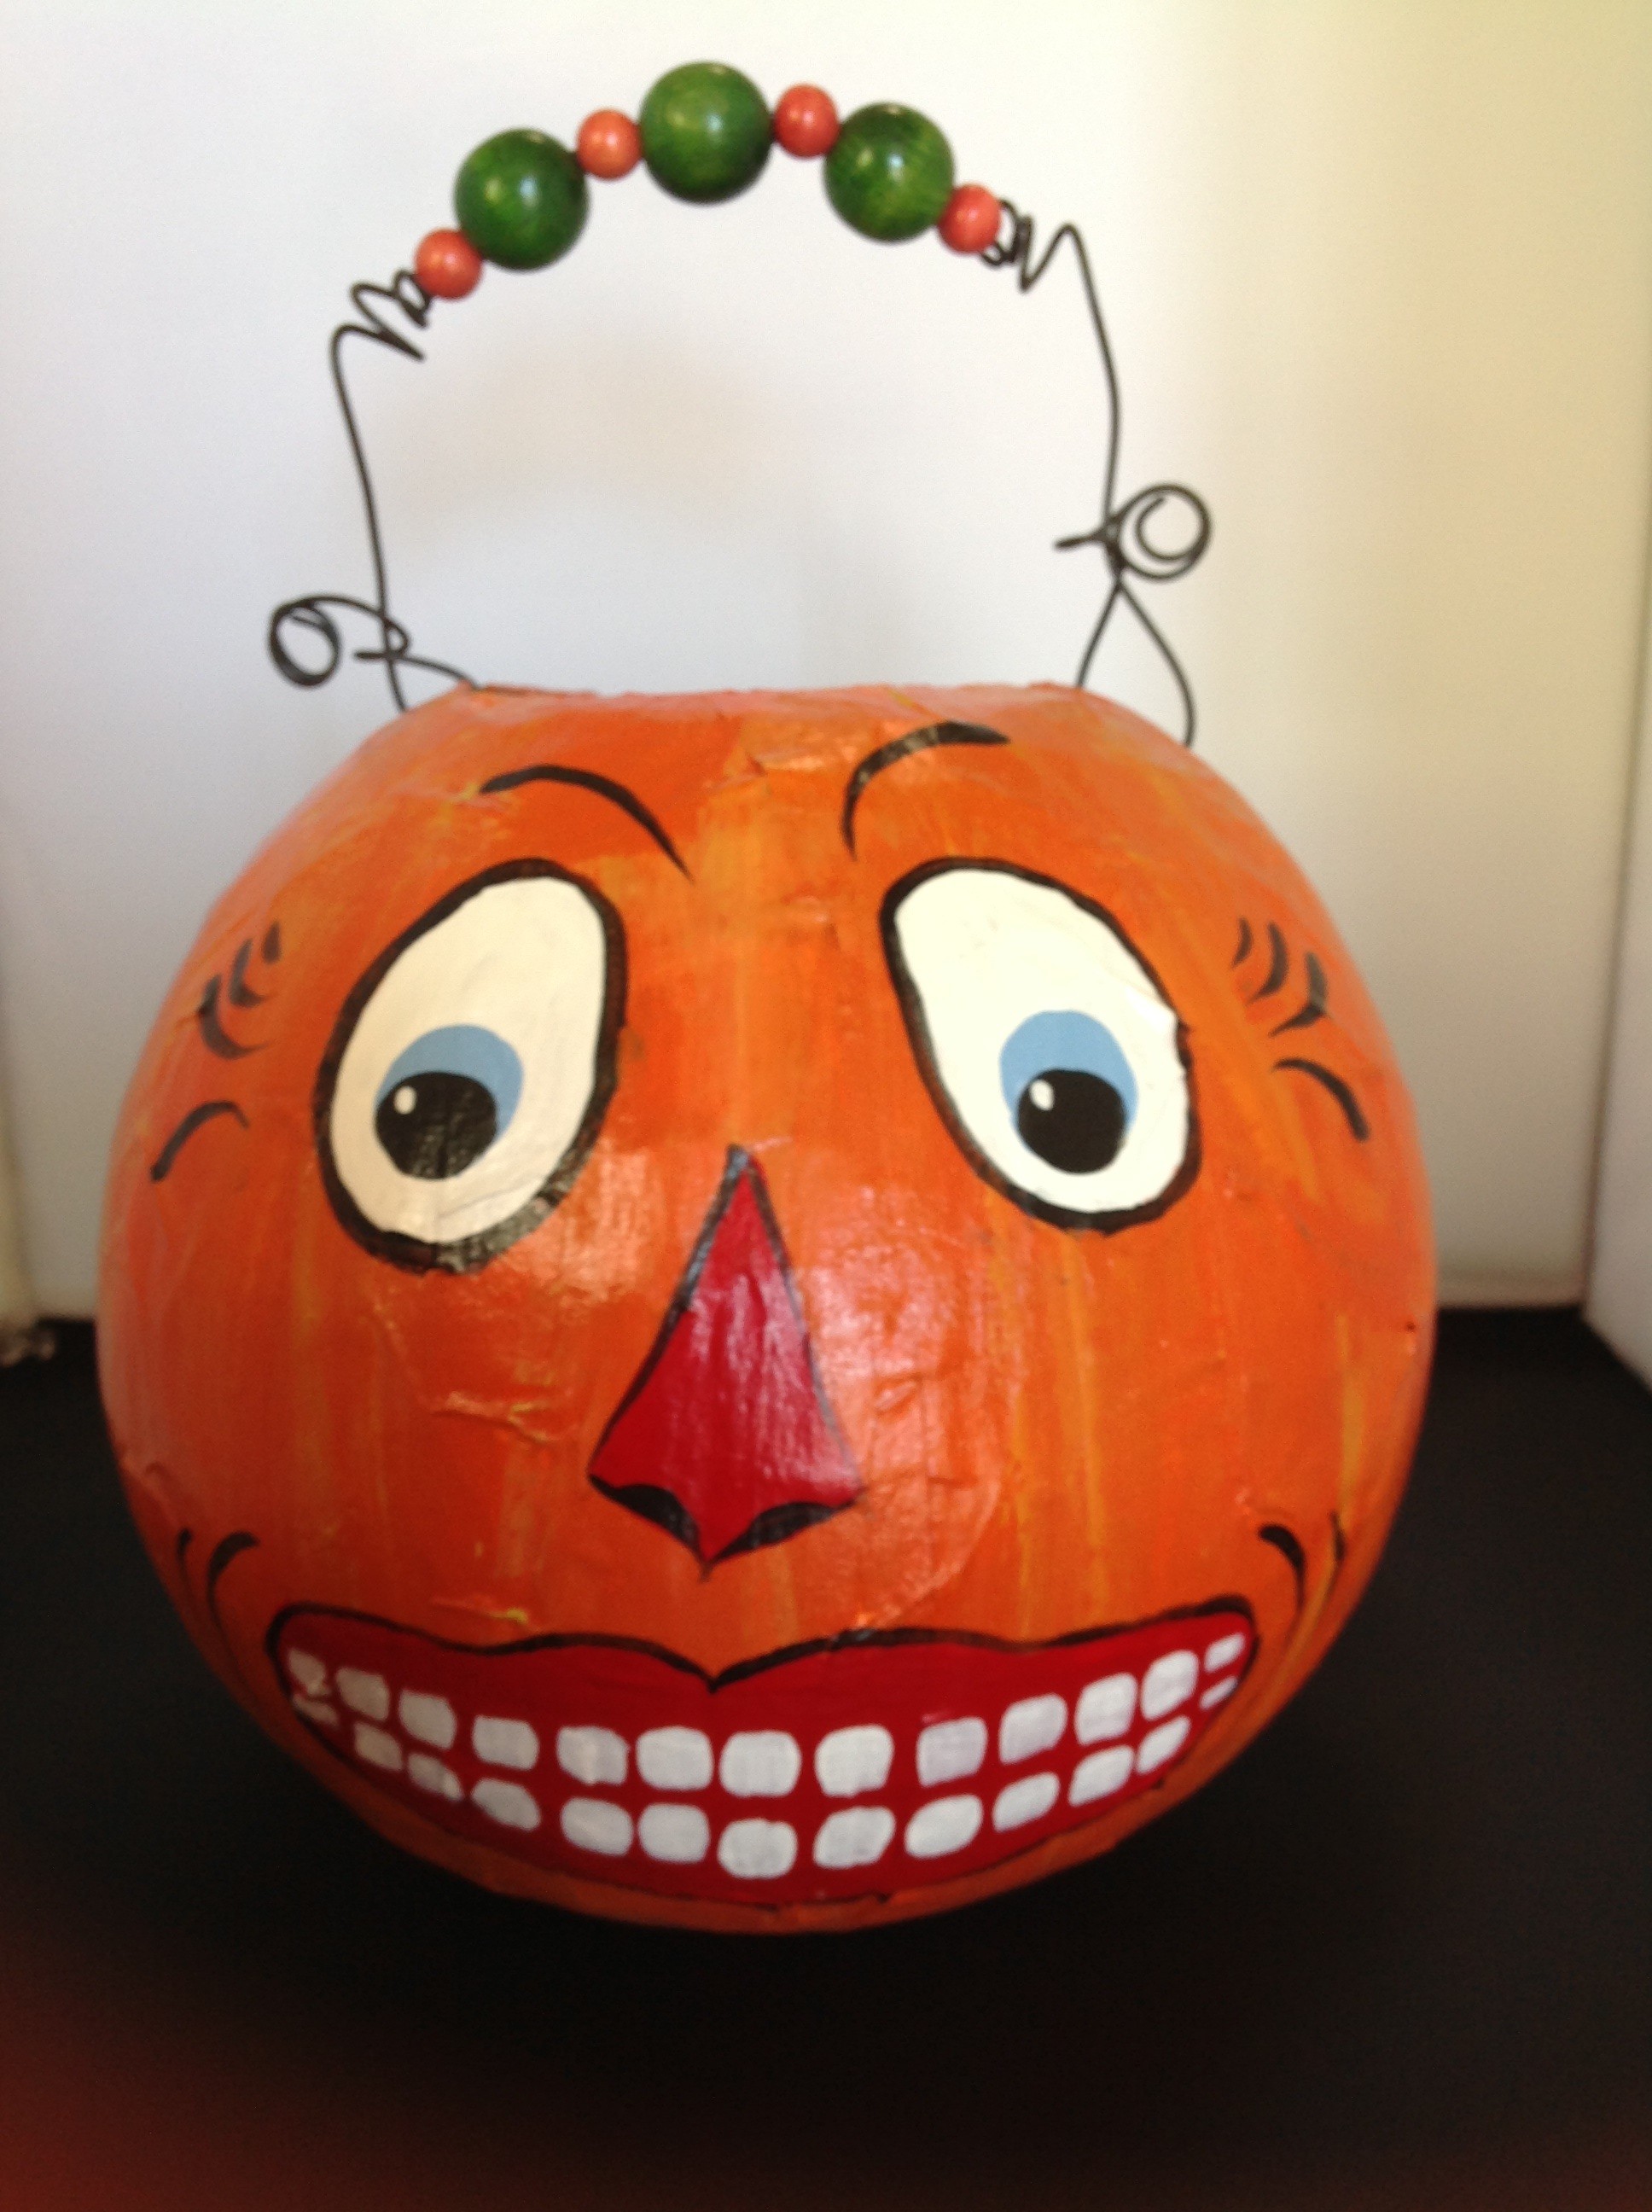
Step Three: Paint with acrylic paints. I used Martha Stewart Adobo to get pumpkin color. I use black on the inside. (better to hide messy streaks and ants. I know you never get ants on your candy.) It took 2 coats of black on the inside and 2 coats of adobo on the outside. Dry between coats. I dry brushed some yellow and green on top of the adobo. Dry brushed means just a little paint on the brush and lightly brush over the top of adobo paint. This gives it an aged patina. Now draw on your face using a piece of chalk. Need inspiration? Look at vintage candy containers online or in a book. I know a book, who would of ever thought it? I like Halloween Collectibles by Mark B. Ledenbach. You will drool. I do. FLOP ALERT Make your face big enough and don’t worry about making a mistake. This is folk art (Art for the People and by the People) Very American. Basecoat the eyes white with 2 coats. The mouth is red with 2 coats of paint. The iris is blue and the teeth are white. The liner work is black. Have fun. Laugh. Stop frowning..This is folk art and don’t forget to sign the bottom with your name and your kids name and the date. It is important. Really.
Step Four: Spray with 2 coats of satin varnish. Dry between coats. Drill 2 holes on the side of the opening of the container about an inch down. I used my Dremel drill but I think you could use a hole punch. Take 18 inches of bailing wire and thread thru and twist to secure. I used 4 small orange wood beads and three large green beads as an accent. Some other ideas for a handle is using rope or twine. How about a leather shoe lace? I am now finished with my first Jack O Lantern Vintage Candy Container. I had a lot of fun. Gotta go, now where are those Hershey bars?
Supply List balloon, newspaper strips, Mod Podge Paper Mache glue, acrylic gesso, Martha Stewart Paint (It is worth it) adobo, red, white, black, blue and yellow. I like Krylon satin varnish and finish with bailing wire and some wood beads.
What fun! Cindy, you made it look so easy but i am sure it took a lot of time,It is so cute! Would it be a good idea to wear gloves or does the Modg podg wash off easily. Well off to get started .
Cindy,
What candy container?
Your husband, Don
I did wear gloves while doing the paper mache portion of the project. I just used the throw away gloves. They worked great.
We have an agreement, I won’t ask how much it costs to golf or fish if you don’t ask me too many questions about my stuff. That last fish was worthy of a trophy. Your wife Cindy
Very neat idea. Your creativity is amazing!
Thank you. I love Halloween.
I am totally going to make Vera a Candy Pumpkin now!
Colleen, I hope you do! You will have so much fun and make a Halloween treasure for Vera too. Thanks for reading my blog.